You can upload your documents using the Page List View or the Page View (in the editor), either way works and gives you the same results.
Go to Your Page List View
First things first!
- Click on pages - in the grey secondary navigation bar or hover over content and click on pages
- You should see all the pages and folders that make up your unique site.
- You can scroll or filter for the documents folder - the Page List View defaults to alphabetic order so the folder should be close to the top.
- Open the folder.
- Click on the upload button next to the new button.
- So let's start uploading a document or two
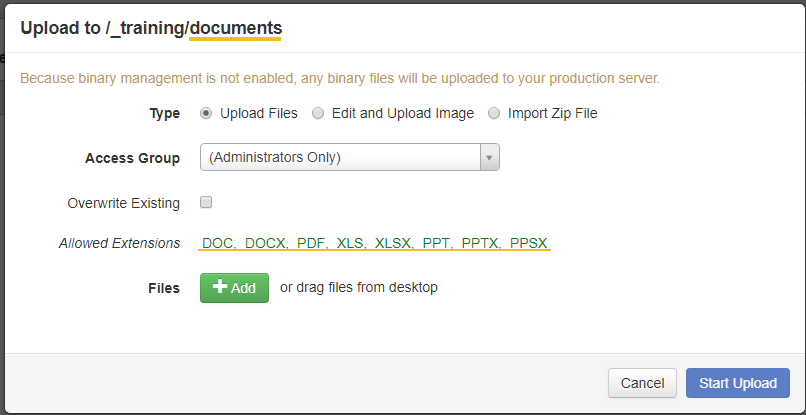
Just make sure that you are in the documents folder - see breadcrumbs at top in image and that the allowed extensions are correct. - Type and Access Group can be left at the default settings - you should not make changes to these settings.
- Overwrite Existing - are you replacing a document that is already in the Documents folder? Then select this button. Just make sure that you name the document the exact same.
- Let's upload a document - Click on the Add button or drag your documents over.
- You can upload one document or many
- You will see a list of your documents - if there is a problem OU will let you know
- in red.
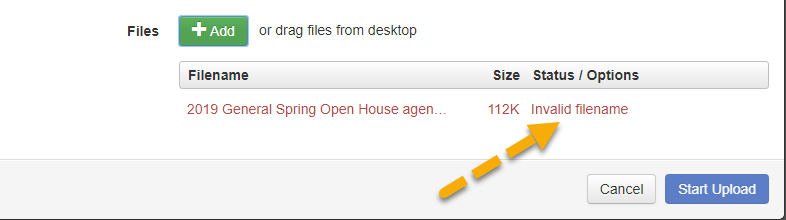
- Click on the three dots and select nename. You will be able to rename the document - use lower case letters, dashes for spaces and no special characters.
- Your document is uploaded now publish the document.
Remember that your documents and pictures are not stored in staging - you only be able to view them in production.