You can upload your pictures in the Page List View navigating to the pictures folder.
Uploading Images
- Click on pages - in the grey secondary navigation bar or hover over content and click on pages
- Navigate to the picture folder, open the picture folder. For information on image sets visit our helps page. If in the pictures folder - there will be up to 5 different sizes, if in the fac-staff-profiles folder under the pictures folder, you will have one image resized to fit our directory snippets. there is also a custom folder for custom size images.
- Click the Upload button in the top right of the screen.

- So let's start uploading an image
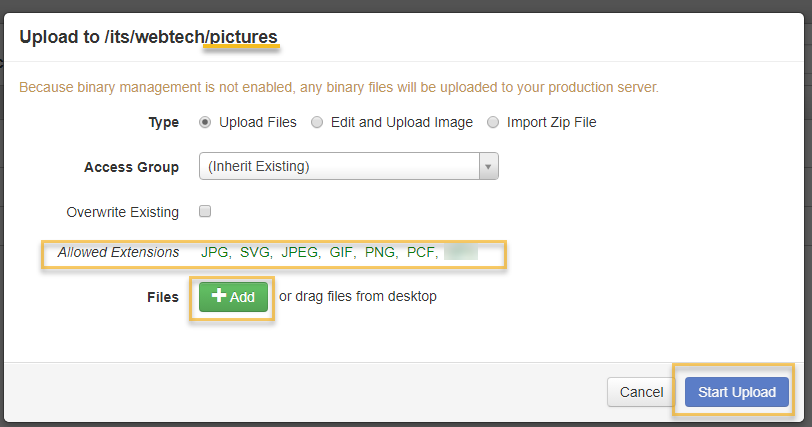
- Just make sure that you are in the pictures folder - see breadcrumbs at top in image and that the allowed extensions are correct.
- Type and Access Group can be left at the default settings - you should not make changes to these settings.
- Let's upload a picture- Click on the Add button or drag your picture over.
- You can upload one picture or multiple
- You will see a list of your pictures- if there is a problem OMNI CMS will let you
know - in red.
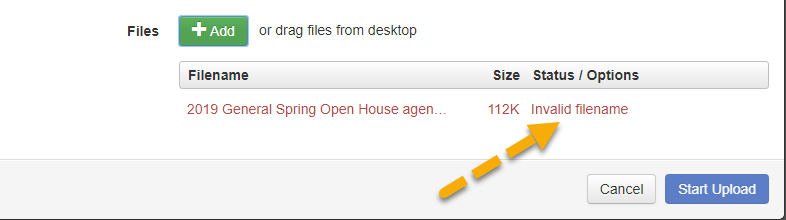
- Hover over the Status/Options - the three dots-and you will be able to rename the picture using no capital letters, no spaces (use a hyphen to replace the space), and no special characters.
- Your picture is uploaded! Make sure that you publish the picture. Publishing a picture is the same way you publish a page - click on the three dots to the right of the file - click publish, publish again and then one more time.
- Your picture is ready for you to add to any of your web pages.