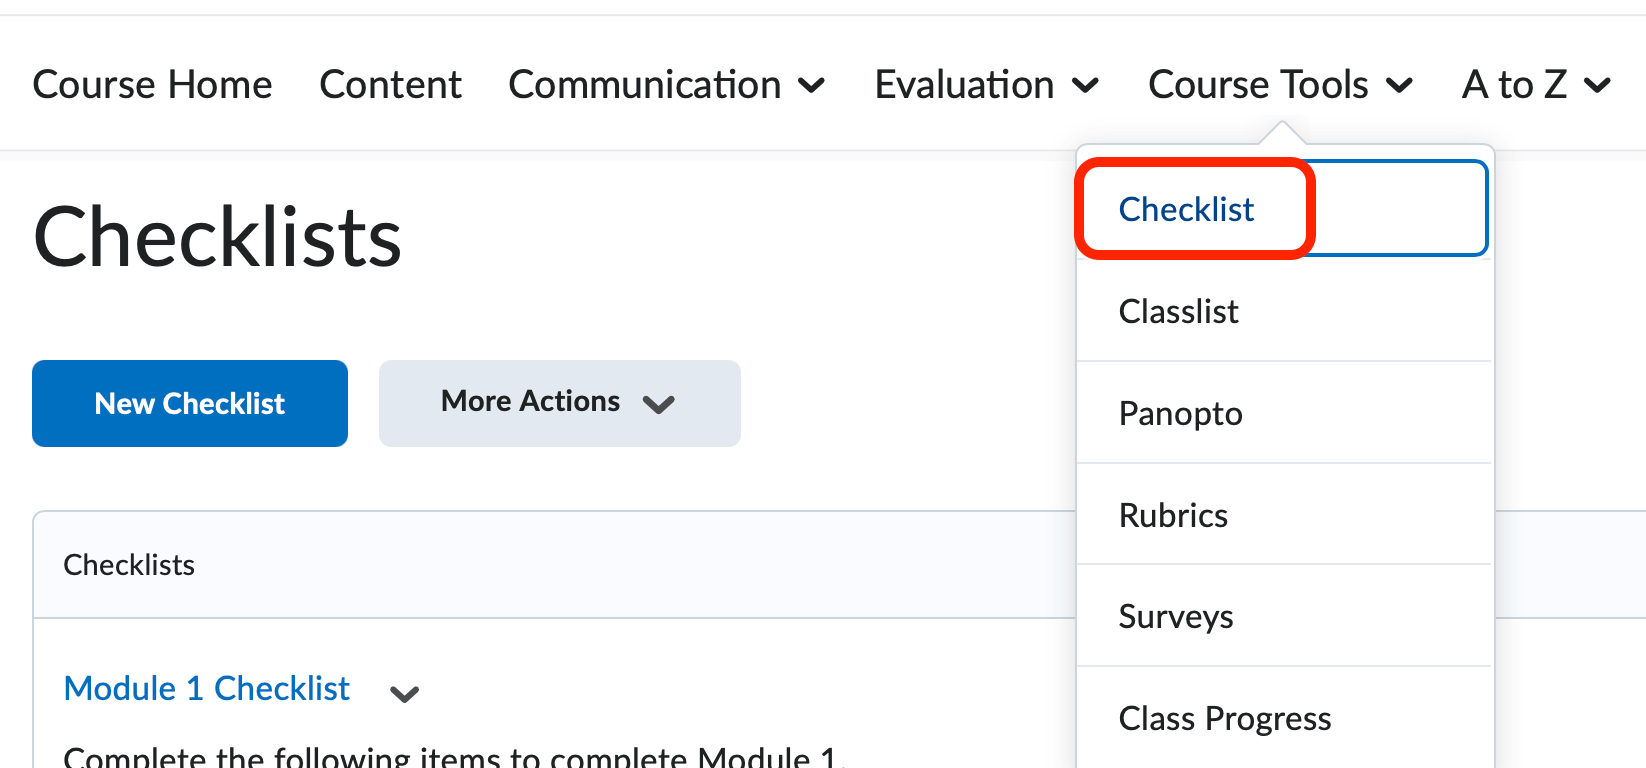
Accessing Checklists
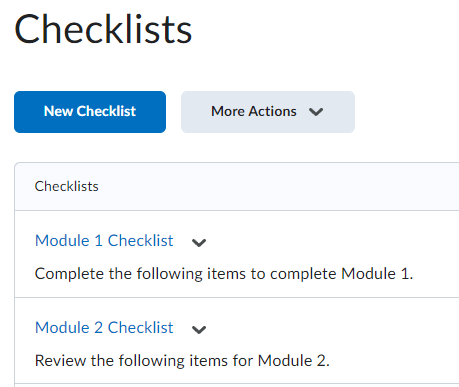
To access Checklists, select Checklists from the Course Tools category on the navigation bar.
The Checklist tool allows you to create checklists that you can use to highlight important aspects of your course and make students accountable for completing certain tasks. You can setup multiple checklists with many different categories and items.
-
Create a New Checklist
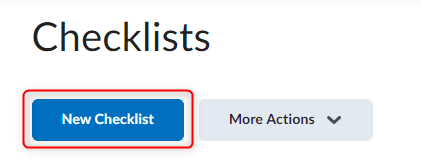
- Select the New Checklist button to create a new checklist.
- Enter a Title and Description for your Checklist.
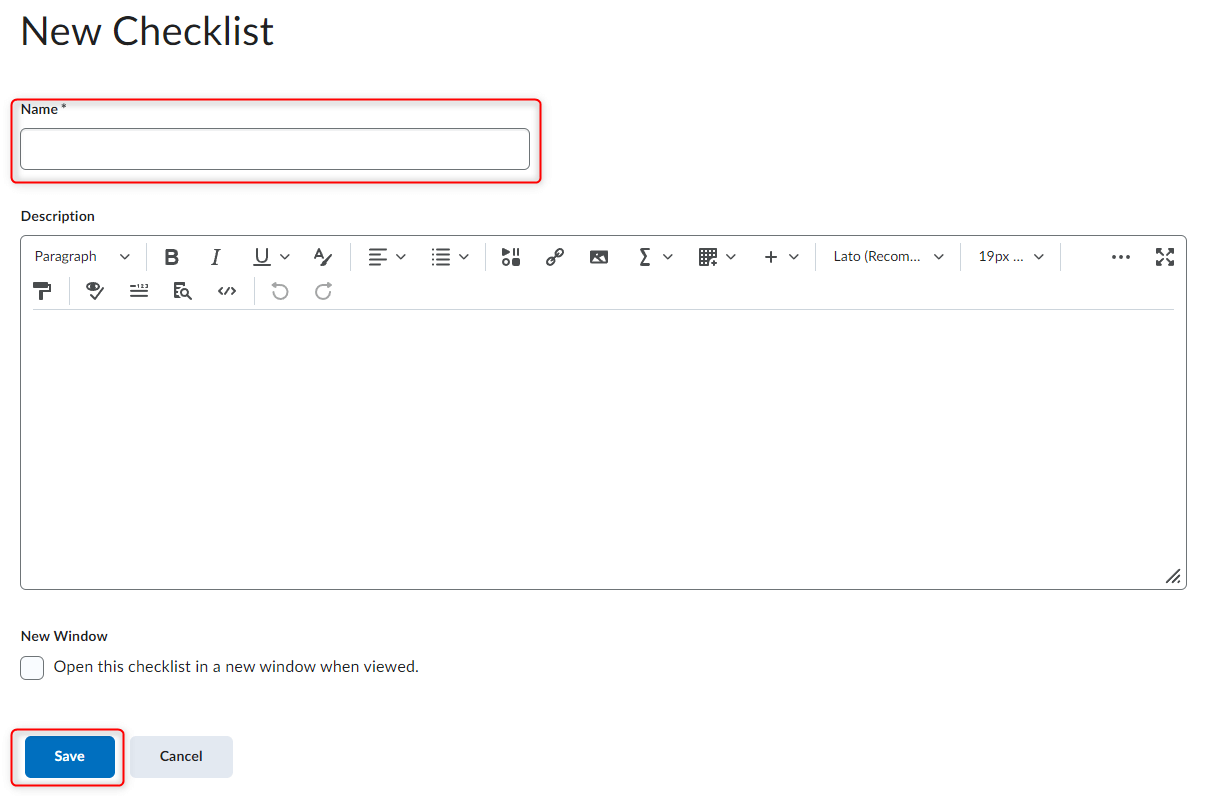
- (Optional) choose to have the Checklist open in a new window by checking the box at the bottom of the dialog window.
- When finished, select Save to create the Checklist.
- Select the New Checklist button to create a new checklist.
-
Create Checklist Categories
After you create your Checklist you will need to create categories to better organize your checklists.
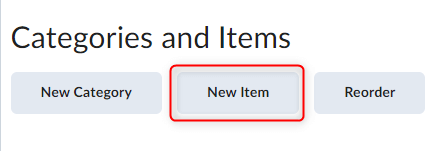
- Below the information you just entered, click the New Category button.
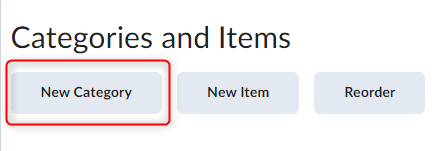
- Enter a Category Name and optional Description.
- When you are finished, click Save.
You may re-order or delete categories.
- Below the information you just entered, click the New Category button.
-
Create Checklist Items
After you create your Checklist Categories you will be able to add your individual Checklist Items.
- From within the Edit Checklist window, click the New Item button.
- Select the Category for the Checklist Item.
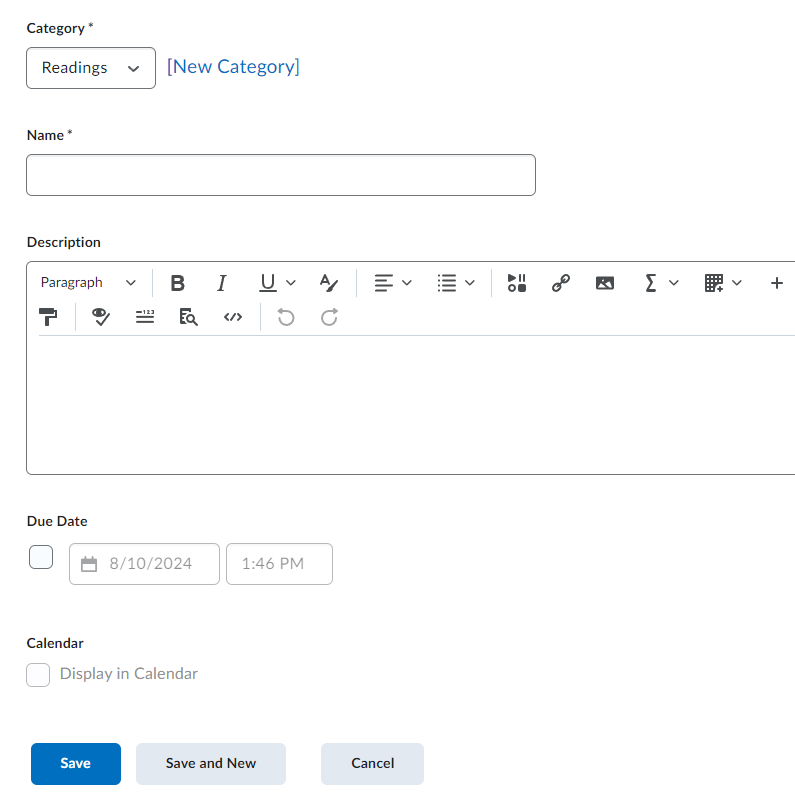
- Provide a Name and description (optional).
- Optional: Set a Due Date and Calendar display options.
- Be sure to Save when finished.
- From within the Edit Checklist window, click the New Item button.
-
Editing Items and Categories
- From the Checklists page, click on the checklist that contains the item(s) and/or categories you would like to edit.
- Click on the item or category to open the edit page.
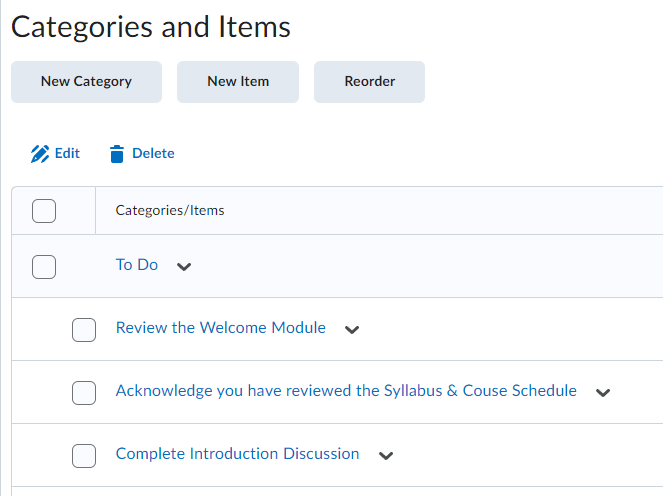
- Make the necessary changes.
- Click Save.
- From the Checklists page, click on the checklist that contains the item(s) and/or categories you would like to edit.
-
Deleting Items and Categories within a Checklist
- From the Checklists page, click on the checklist that contains the item(s) and/or categories you would like to delete.
- Mark the checkbox for the particular item or category.
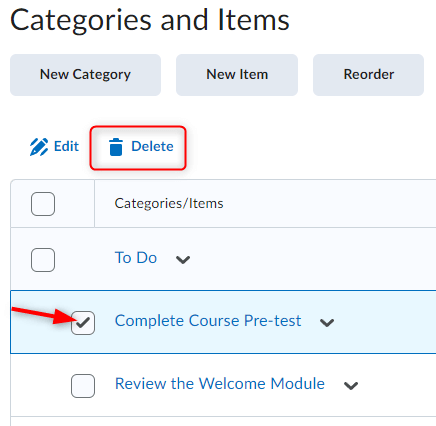
- Click the Delete icon.
-
Delete a Checklist
- From the Checklists page, click the More Actions button and then choose Delete.
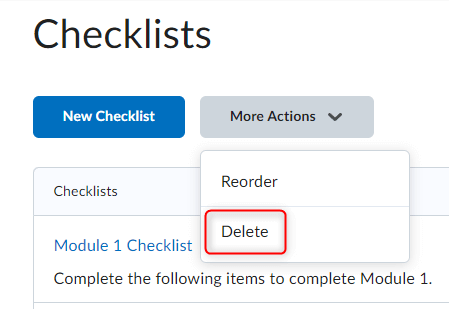
- Mark the checklist you would like to delete.
- Click the Delect Selected button.
- From the Checklists page, click the More Actions button and then choose Delete.