Accessing Assessments
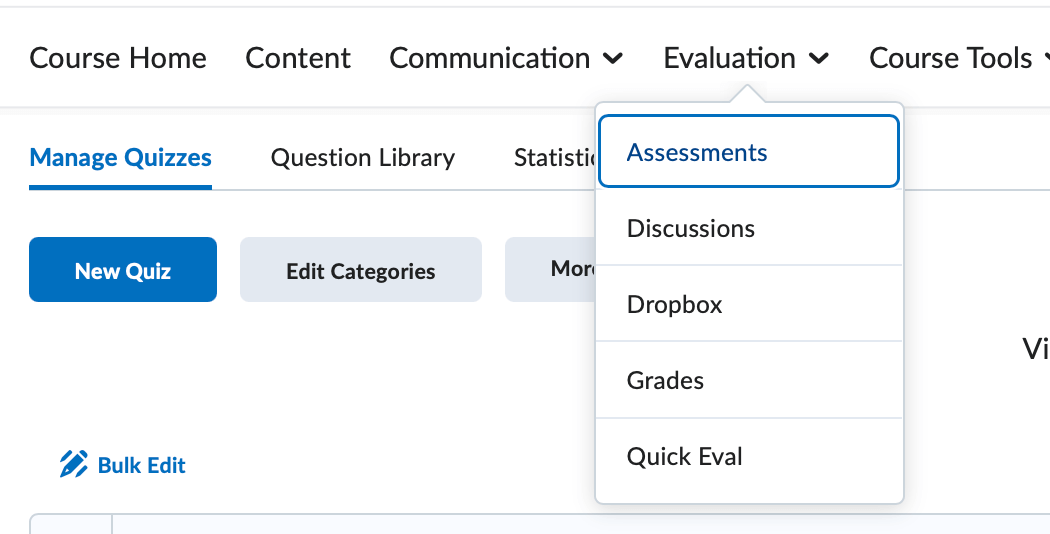
To access the Assessments tool, from the Course Nav Bar click to expand the Evaluation link group and select Assessments.
The Assessments tool allows you to create online quizzes to gauge a student's understanding of course material. With a variety of quiz options, question types, and flexible availability, your online quizzes can be as simple or as complex as you prefer. The Assessments tool offers question types in both subjective and objective formats. Additionally, collaboration with the third party software Respondus can make importing your quizzes a breeze.
Creating Questions
When creating quizzes, a best practice is to begin in the Question Library. The Question Library is a question repository shared across the Assessment (Quiz) tool and the Survey tool. Creating questions in the Question Library is also the only way to create a question pool quiz.
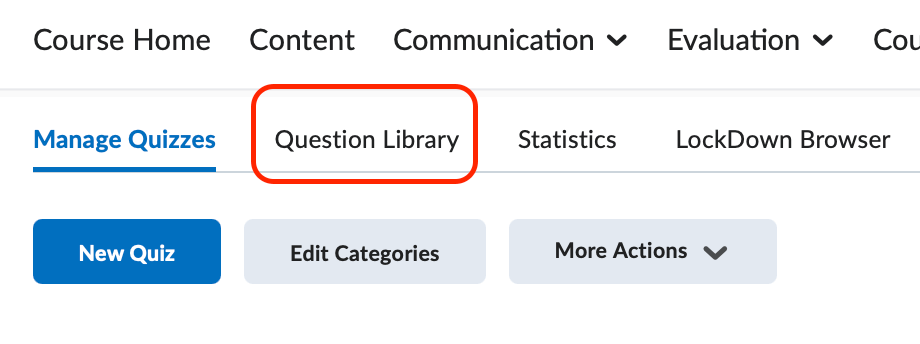
To navigate to the Question Library, Click the Question Library menu option located on the Manage Quizzes page.
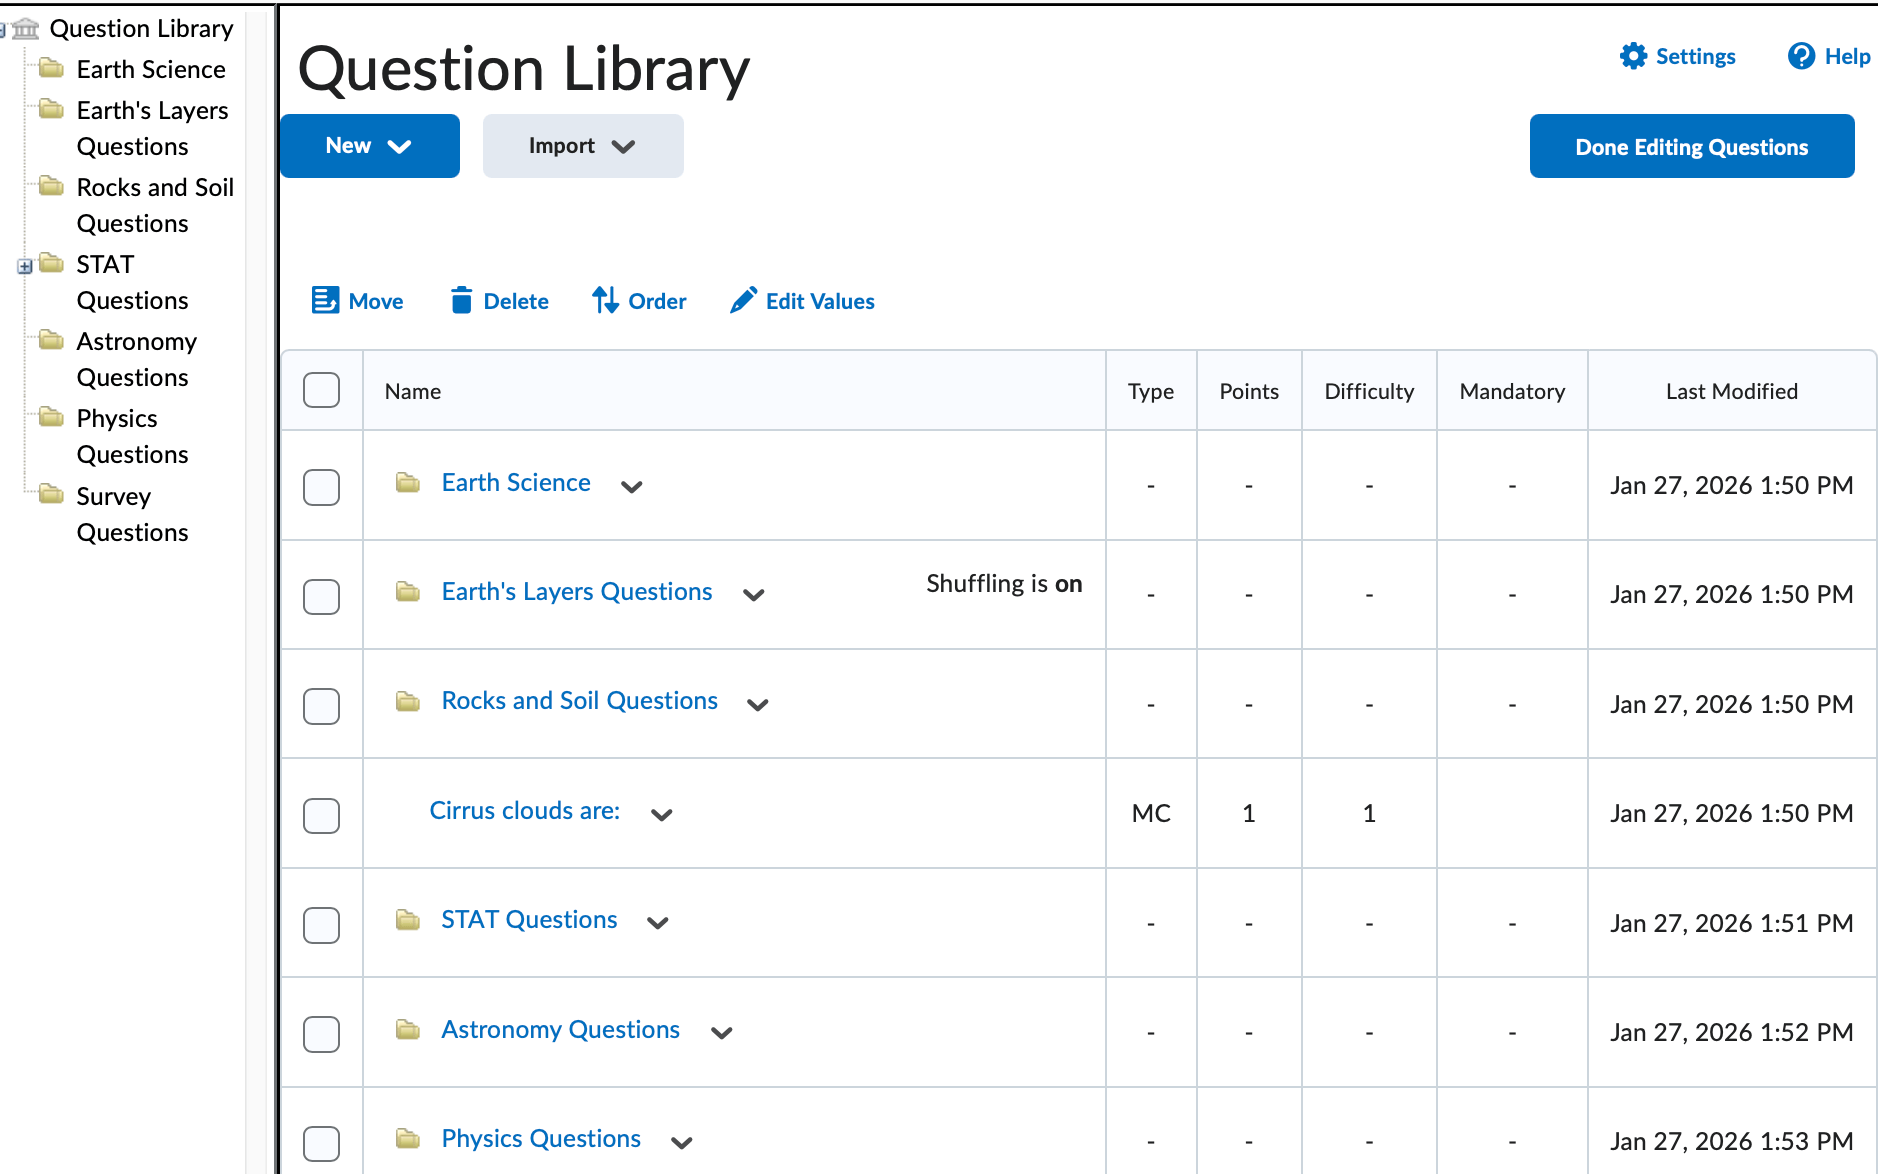
The Question Library is divided into two frames. The Left-Frame holds the tree-structure of your question sections (or folders). The Right-Frame will display your question sections (folders) as well as any questions not belonging to a specific folder.


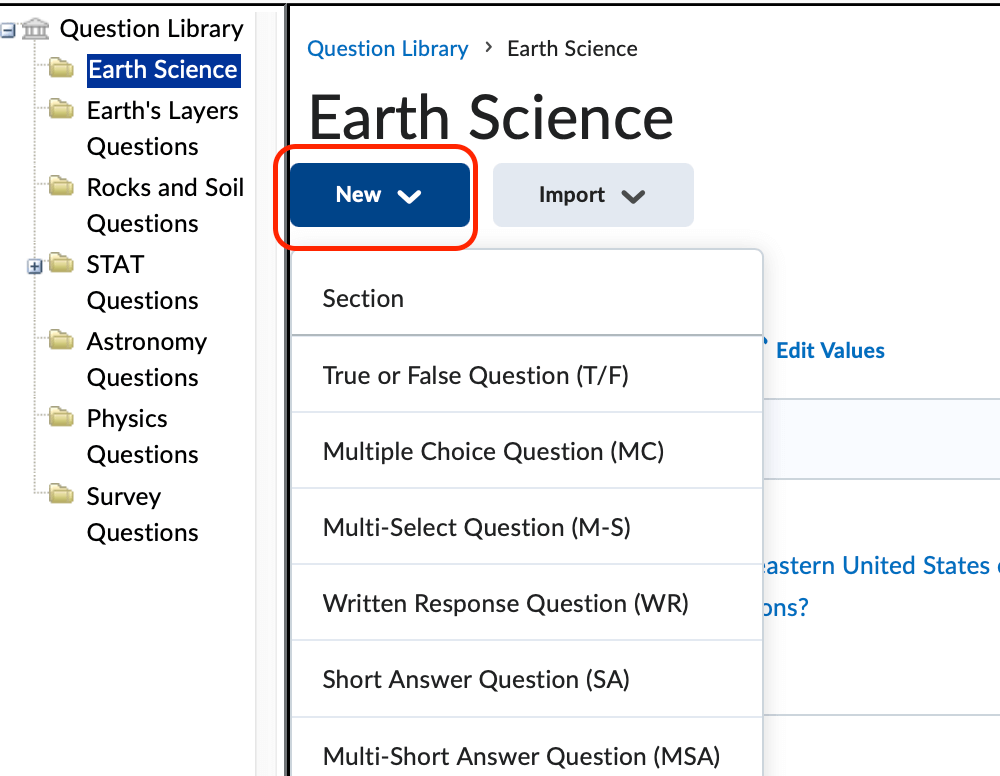
From this page, use the New and Import buttons to begin creating questions and sections. Use the menu buttons to Move, Delete, Reorder, and Edit Values for the questions and sections.
![]()
When you've completed your question building workflow, click the Done Editing Questions button on the far right to return to the Manage Quizzes page.

Click on a question type to view field-by-field instructions for creating a question:
-
Sections (Folders)
Sections act as folders within quizzes and the question library. It is a good practice to organize your course materials. Sections can aid that organization.
- Enter a Section Title. Note that, by default, students will see the section title unless you turn off that
access.

- The Section Text field displays below the section title, and students will see unless
turned off.

- Display Options:
Check the shuffle questions in this section to shuffle sections and question pools in this section.
- Click Save to return back to the Question Library.
- Enter a Section Title. Note that, by default, students will see the section title unless you turn off that
access.
-
True/False
The True/False question type is used to determine the validity of a statement. By default, D2L presents the student with only two answer options, True and False.
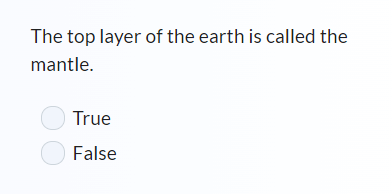
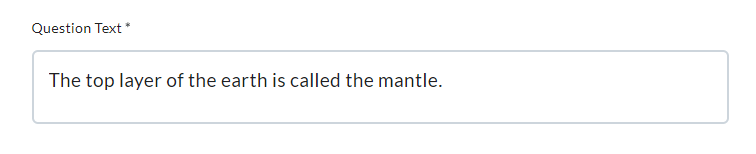
- Enter the question or question prompt in the Question Text textbox. Note that you may want to include a prefix for True/False Questions. A preview
of how the question will appear to students will display in the preview pane.
- Optional: To Insert an Image with question text, click in the textbox and in the text editor options click on
the plus (+) sign. On the dropdown select Insert Image. Alternately, you may insert an image via the Insert Stuff icon.

- Alternative Text – If you inserted an image, add a short description of that image in this textbox.
- Set the points by assigning a value in the Default Points field.
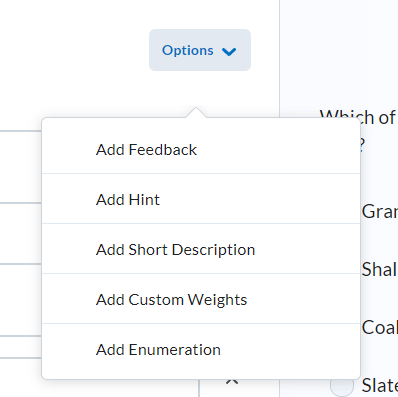
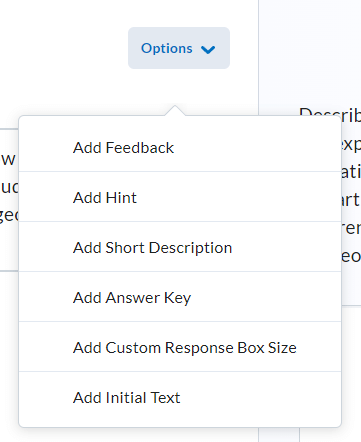
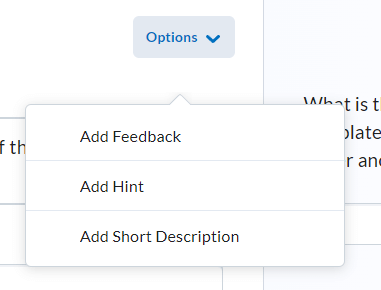
- Optional: Additional Options for the question:
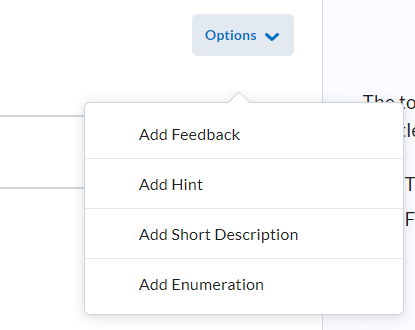
- Add Feedback – Displays feedback for each answer to the student after they have submitted an attempt, regardless of the answer option selected.
- Add Hint – Displays a hint to the question to the student during the exam.
- Add Short Description – Displays a short description to the question.
- Add Enumeration – By default, D2L does not include an enumeration option for your answer options. If you would like to include enumeration, select an option from the dropdown menu.
- Choose a Save option.
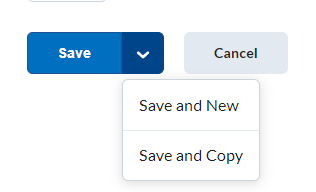
- Save – Saves the current question and returns you back to the collection root folder.
- Save and New - Saves the current question and displays a new, blank question of the same question type.
- Save and Copy - Saves the current question and displays a new, exact copy of the now previous question.
- Cancel – Discards all changes.
- Enter the question or question prompt in the Question Text textbox. Note that you may want to include a prefix for True/False Questions. A preview
of how the question will appear to students will display in the preview pane.
-
Multiple Choice
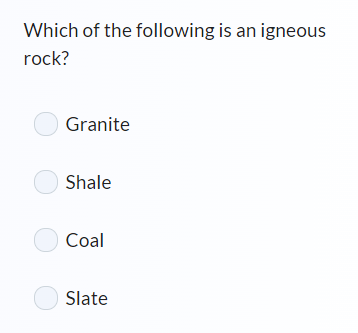
The Multiple Choice question type is used to give a student a list of answer options that may answer the question prompt. In a MC question, a student is able to select only one answer option.
- Enter the question or question prompt in the Question Text textbox.
- Optional: To Insert an Image with question text, click in the textbox and in the text editor to insert.
- Alternative Text – If you inserted an image, add a short description of that image in this textbox.
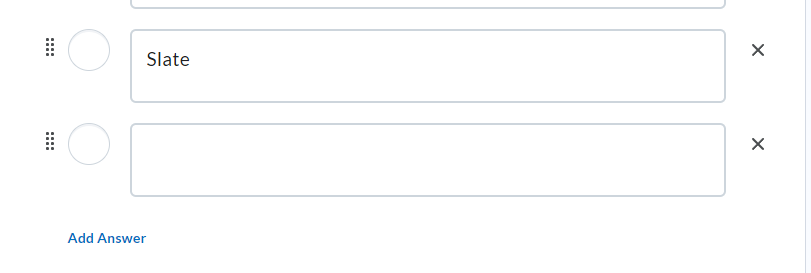
- Optional: If the question requires more than four answer options, use the Add Answer button to add an additional answer option row.
- Optional: Randomize answer order - Marking this checkbox will randomize the answer options for this particular question.
Note that this feature will not randomize the order of the questions, only the order
of the question answer options. If you have a question with answer options that refer directly to other answer options
(e.g. A and B only), do not select this option.

- Set the points by assigning a value in the Default Points field.
- Optional: Additional Options for the question:
- Choose a Save option.
-
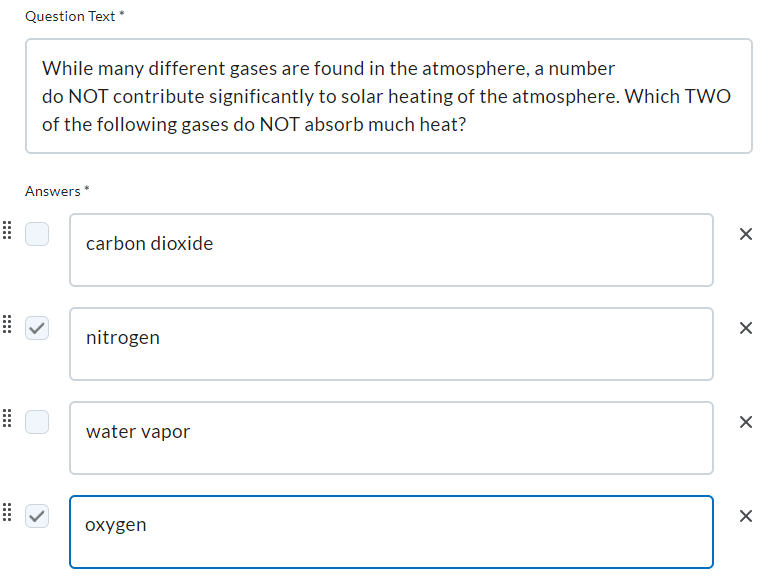
Multi-Select
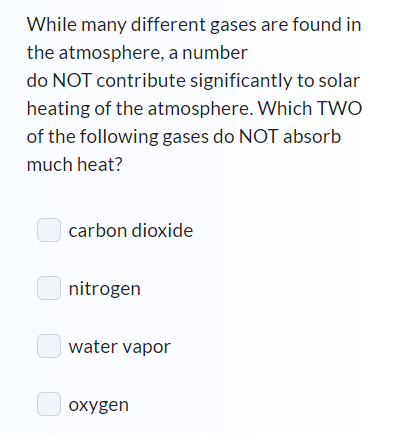
The Multi-Select question type is used to give a student a list of answer options that may answer the question prompt. In a Multi-Select question, a student is able to select multiple answer options.
- Enter the question or question prompt in the Question Text textbox.
- Optional: To Insert an Image with question text, click in the textbox and in the text editor options to insert.
- Alternative Text – If you inserted an image, add a short description of that image in this textbox.
- Optional: If the question requires more than four answer options, use the Add Answer button to add an additional answer option row.
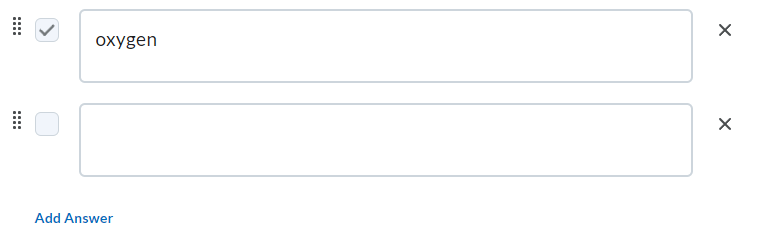
- To delete an answer option row, click the X icon.
- Identify the correct answer(s) by placing a checkmark next to the correct answer option’s row. You may identify
as many correct answers as you wish.
- Optional: Additional Options for the question:
- Optional: Randomize answer order - Marking this checkbox will randomize the answer options for this particular question.
- Set the points by assigning a value in the Default Points field.
- Grading - This option controls how D2L calculates the question's score:
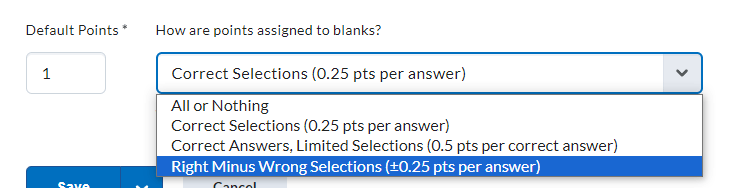
- All or Nothing - Students must select all correct answer or they will receive a 0 for the question.
- Right Minus Wrong - A student's question score is calculated by subtracting the number of incorrect answers from the number of correct answers.
- Correct Answers, Limited Selections - A student's question score is limited to the number of correct answers. Student's earn partial points for each correct answer selected.
- Correct Selections - A student's score is calculated by giving partial points for each correct answer selected and left blank.
- Choose a Save option.
-
Written Response (Essay)
The Written Response, or Essay, question type is used to give a student the opportunity to type an extended answer into an input box. D2L cannot grade written response question types automatically. An instructor or grader must manually award each student a question point value.
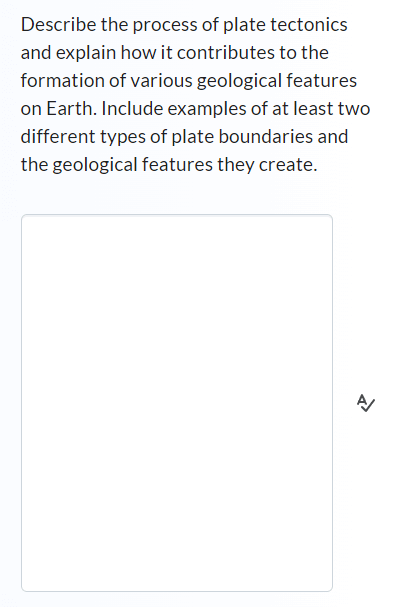
- Enter the question or question prompt in the Question Text textbox.
- Optional: To Insert an Image with question text, click in the textbox and in the text editor to insert.
- Alternative Text – If you inserted an image, add a short description of that image in this textbox.
- Optional: Enable HTML Editor for learner responses - Check this box to provide your students with the ability to format their text answer.

- Optional: To allow students to attach files and images, check the Allow learners to insert images and attachments box.
- Set the points by assigning a value in the Default Points field.
- Optional: Additional Options for the question:
- Choose a Save option.
-
Short Answer
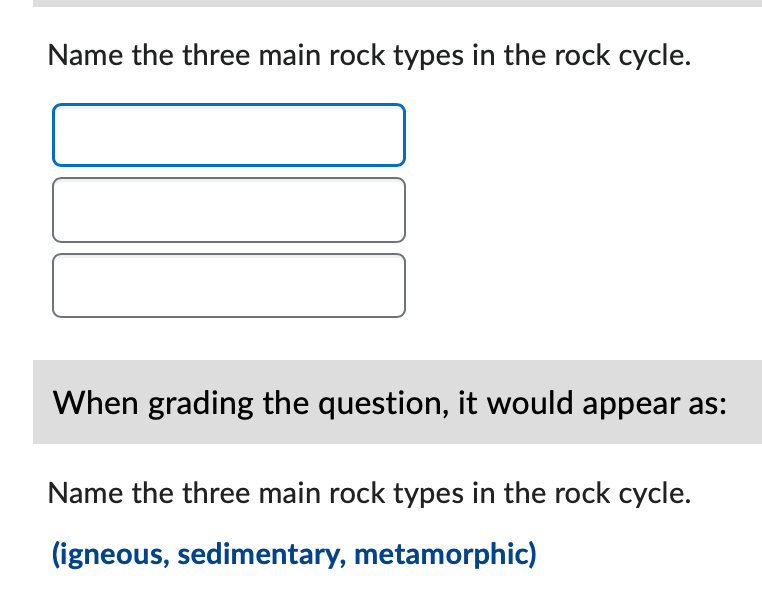
The Short Answer question type is used to give a student the opportunity to type a short one word or brief sentence answer into an input box(es). D2L can grade short answer questions automatically but it is a good practice to review the automatic grading and manually override a student's question point value when deemed necessary.

- Enter the question or question prompt in the Question Text textbox. A preview of how the question will appear to students will display in the preview pane.
- Optional: To Insert an Image with question text, click in the textbox and in the text editor to insert.
- Alternative Text – If you inserted an image, add a short description of that image in this textbox.
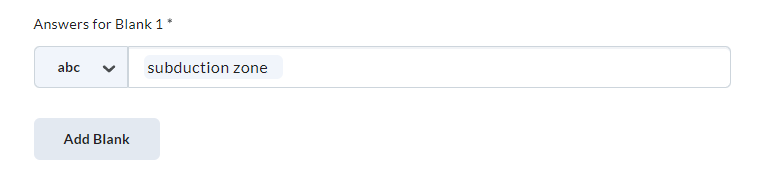
- Optional: Add Blank – For Short answer and Fill-In-The-Blank question types, you must create blanks to
create a textbox to hold the student's answer(s). By default, short answer questions
have only one blank. To add additional blanks, click the Add Blank button.
- To delete a blank option, click the X icon.
- Set the points by assigning a value in the Default Points field.
- Evaluation Options:
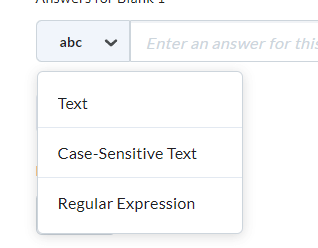
- Text - D2L will evaluate a student's answer regardless of the case used.
- Case Sensitive Text - D2L will evaluate a student's answer along with Case Correctness.
- Regular Expression - Use alpha-numeric and meta-characters to determine the correct answer. Case sensitivity is determined by expression formulas you set. For assistance with Regular Expressions, contact D2L faculty support by phone: (423) 439-8616 or by email: d2lhelp@etsu.edu.
- Optional: Additional Options for the question:
- Choose a Save option.
-
Multi-Short Answer (MSA)
The Multi-Short Answer question type is used for questions that require two or more answers. To receive full credit for the question, the student must enter all answers, one answer in each blank.
- Optional: Enter a question title. If you do not enter a title, D2L will inherit the first line of the question text
as the Question Title. Note that only the Question Title displays on the Properties tab of Edit Quiz. Also, similar question titles will assume a numbered naming convention (e.g. Which
of the follow1; Which of the follow2).
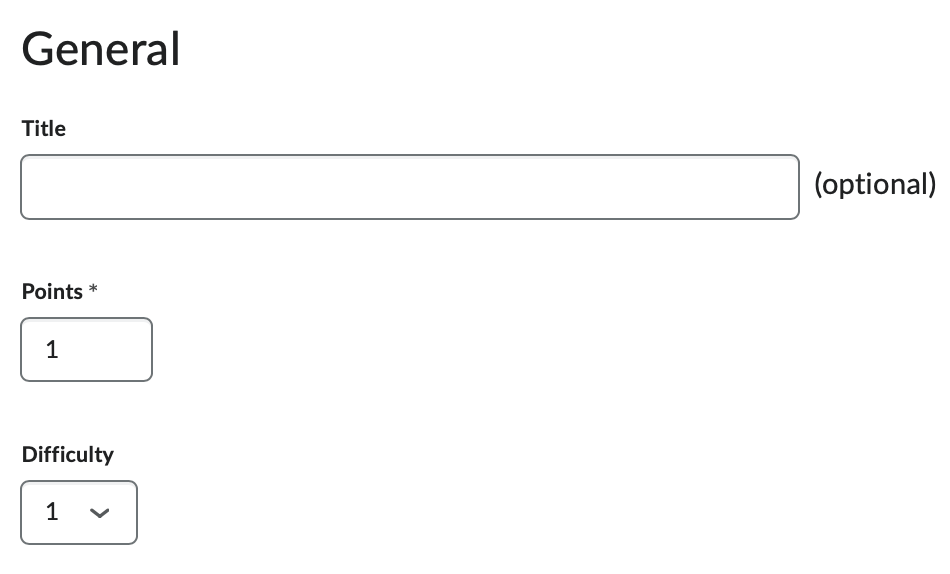
- Points assign a value by entering a number in the Points field.
- Optional: You have the option of assigning a Difficulty level (1-5) to the question. Assigning a difficulty to your questions will give you the ability to view statistics by difficulty.
- Enter the question or question prompt in the Question Text textbox.
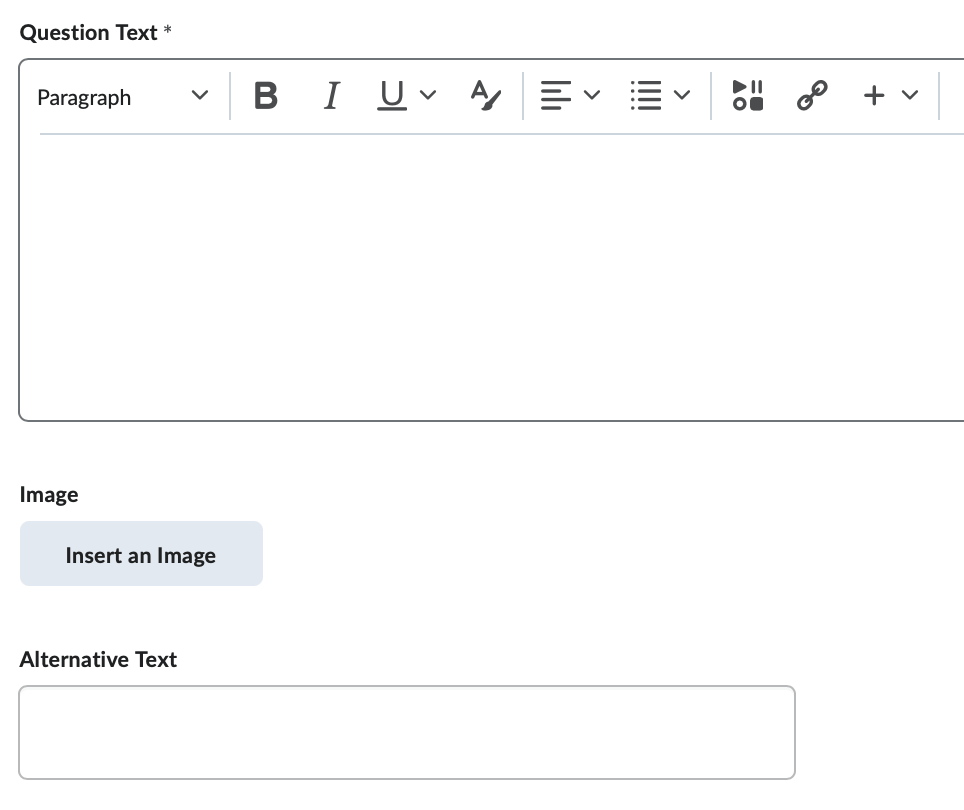
- Optional: Use the Insert an Image button to insert an image above your question text.
- Alternative Text – If you inserted an image, add a short description of that image in this textbox.
- Options:
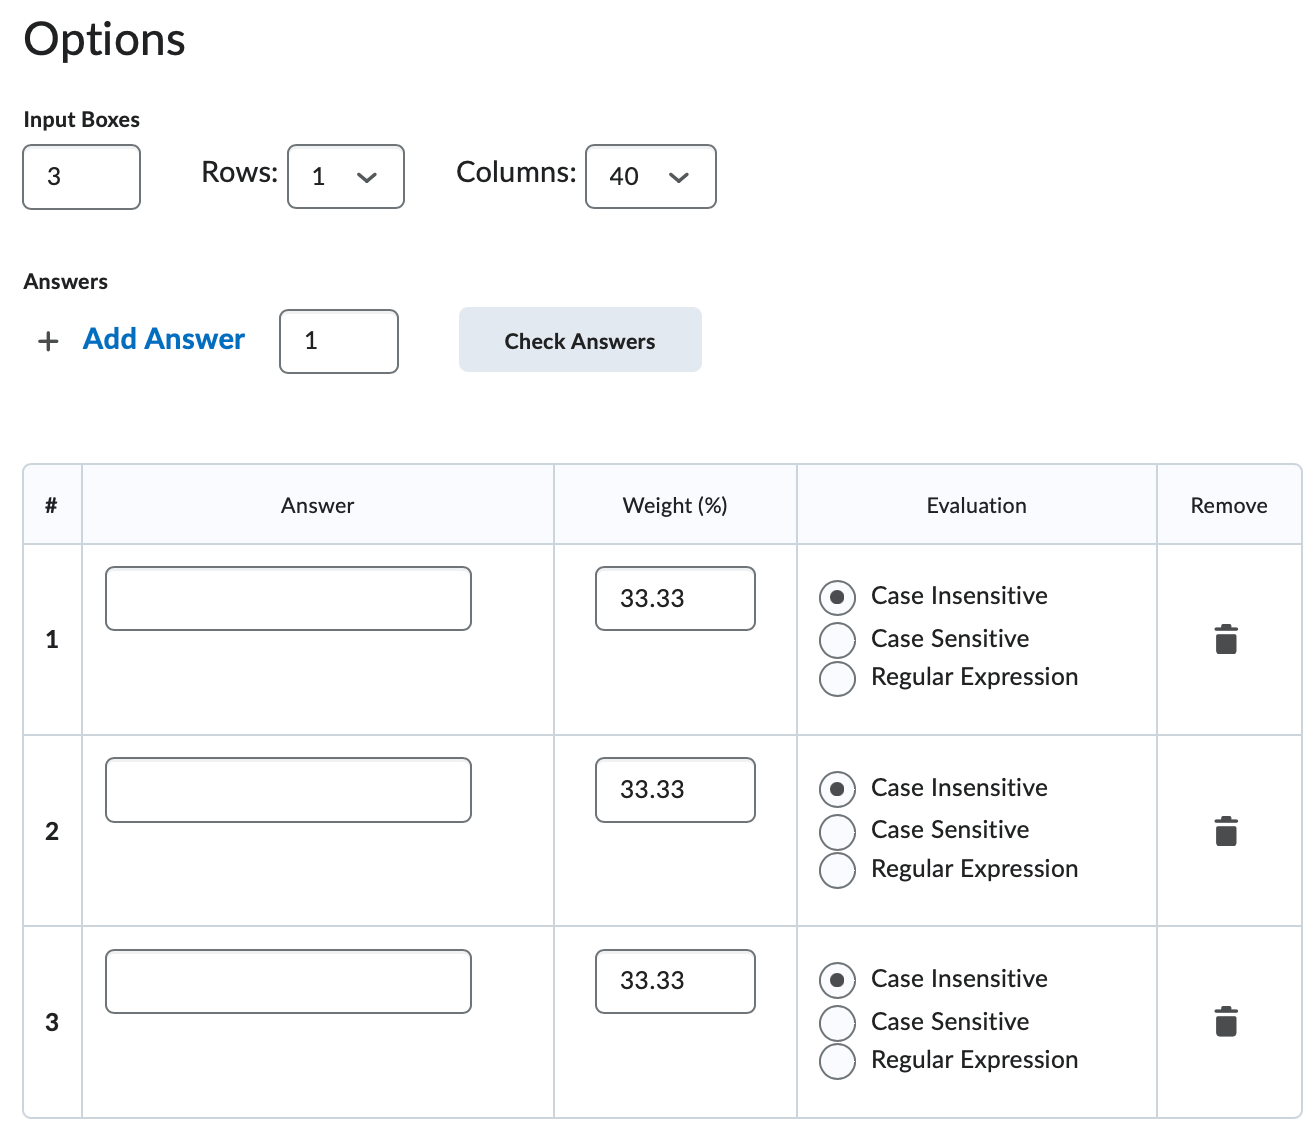
- Input Boxes - Select the number and size of the Answer Blanks you will provide for the student. By default, MSA question types will have three Input Boxes.
- Answer - By default, MSA question types will have three answer options weighted at 33.3%
each, requiring the student to enter the correct three answers into the three blanks
provided. If your MSA question requires more than three answers, use the Add Answer button to add additional Answers. Note that you must verify that the number of answers matches the number of input boxes
you create.
- Check Answers - Use the Check Answers button to verify that the answers you entered are compatible with D2L's evaluation mechanisms.
- The Answer Option Table - Note that each answer option listed in this table relates to only one Blank.
- Answer - Type in the question's correct answer in the Answer box. D2L will evaluate a student's entry by using the exact spelling, spacing, and punctuation entered in the Answer box. Case Sensitivity is set in the Evaluation section.
- Weight - If your question has only one correct answer, identify that correct answers by placing a 100 in the Weight field. If you question requires more than one answer to be considered correct, distribute the weight evenly among the correct answers to ensure that the sum of the weight is 100%.
- Evaluation
- Case Insensitive
- Case Sensitive
- Regular Expression For assistance with Regular Expressions, contact D2L faculty support by phone: (423) 439-8616 or by email: d2lhelp@etsu.edu.
- Delete an answer option by clicking the trashcan icon.
- Optional: Additional Options for the question:
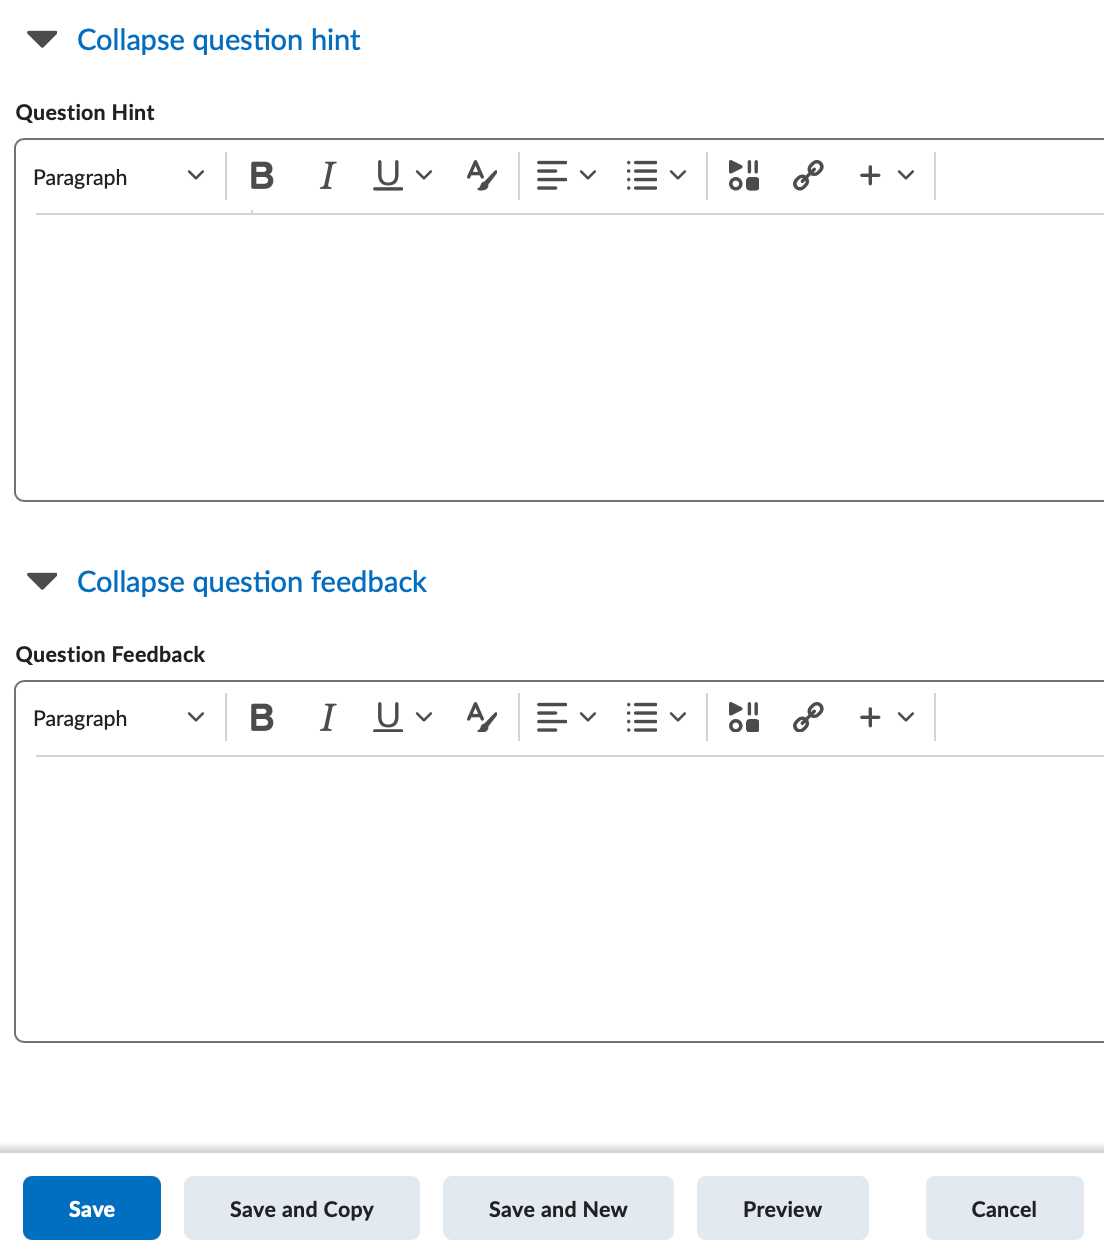
- Enter a Question Hint. Question hints display to the student during the exam.
- Enter Question Feedback. Question feedback displays to the student after they have submitted an attempt, regardless of the answer option selected.
- Choose a Save option.
- Optional: Enter a question title. If you do not enter a title, D2L will inherit the first line of the question text
as the Question Title. Note that only the Question Title displays on the Properties tab of Edit Quiz. Also, similar question titles will assume a numbered naming convention (e.g. Which
of the follow1; Which of the follow2).
-
Fill-In-The-Blank
Fill-in-the-Blank question types function similarly to Multi-Short-Answer question types in that you may create multiple blanks. The major difference, however, is that the answers for each blank are not interchangeable. Also, FIB question types allow for you to insert blanks in the middle of text sections, replicating a true "fill in the blank" experience.

- Optional: Enter a question title. If you do not enter a title, D2L will inherit the first line of the question text as the Question Title.
- Points assign a value by entering a number in the Points field.
- Optional: You have the option of assigning a Difficulty level (1-5) to the question.
- Optional: Use the Insert an Image button to insert an image above your question text.
- Alternative Text – If you inserted an image, add a short description of that image in this textbox.
- Question Text - By default, D2L presents each new FIB question with one text area, followed by a blank,
followed by an ending text area. (Think: TEXT _____ TEXT) If your question calls for
additional text areas or blanks, use the Add Blank and Add Text buttons to add additional fields. Note that you are not able to reorder the text and blank rows so you may be required to add or delete blanks and texts
to achieve your desired results.
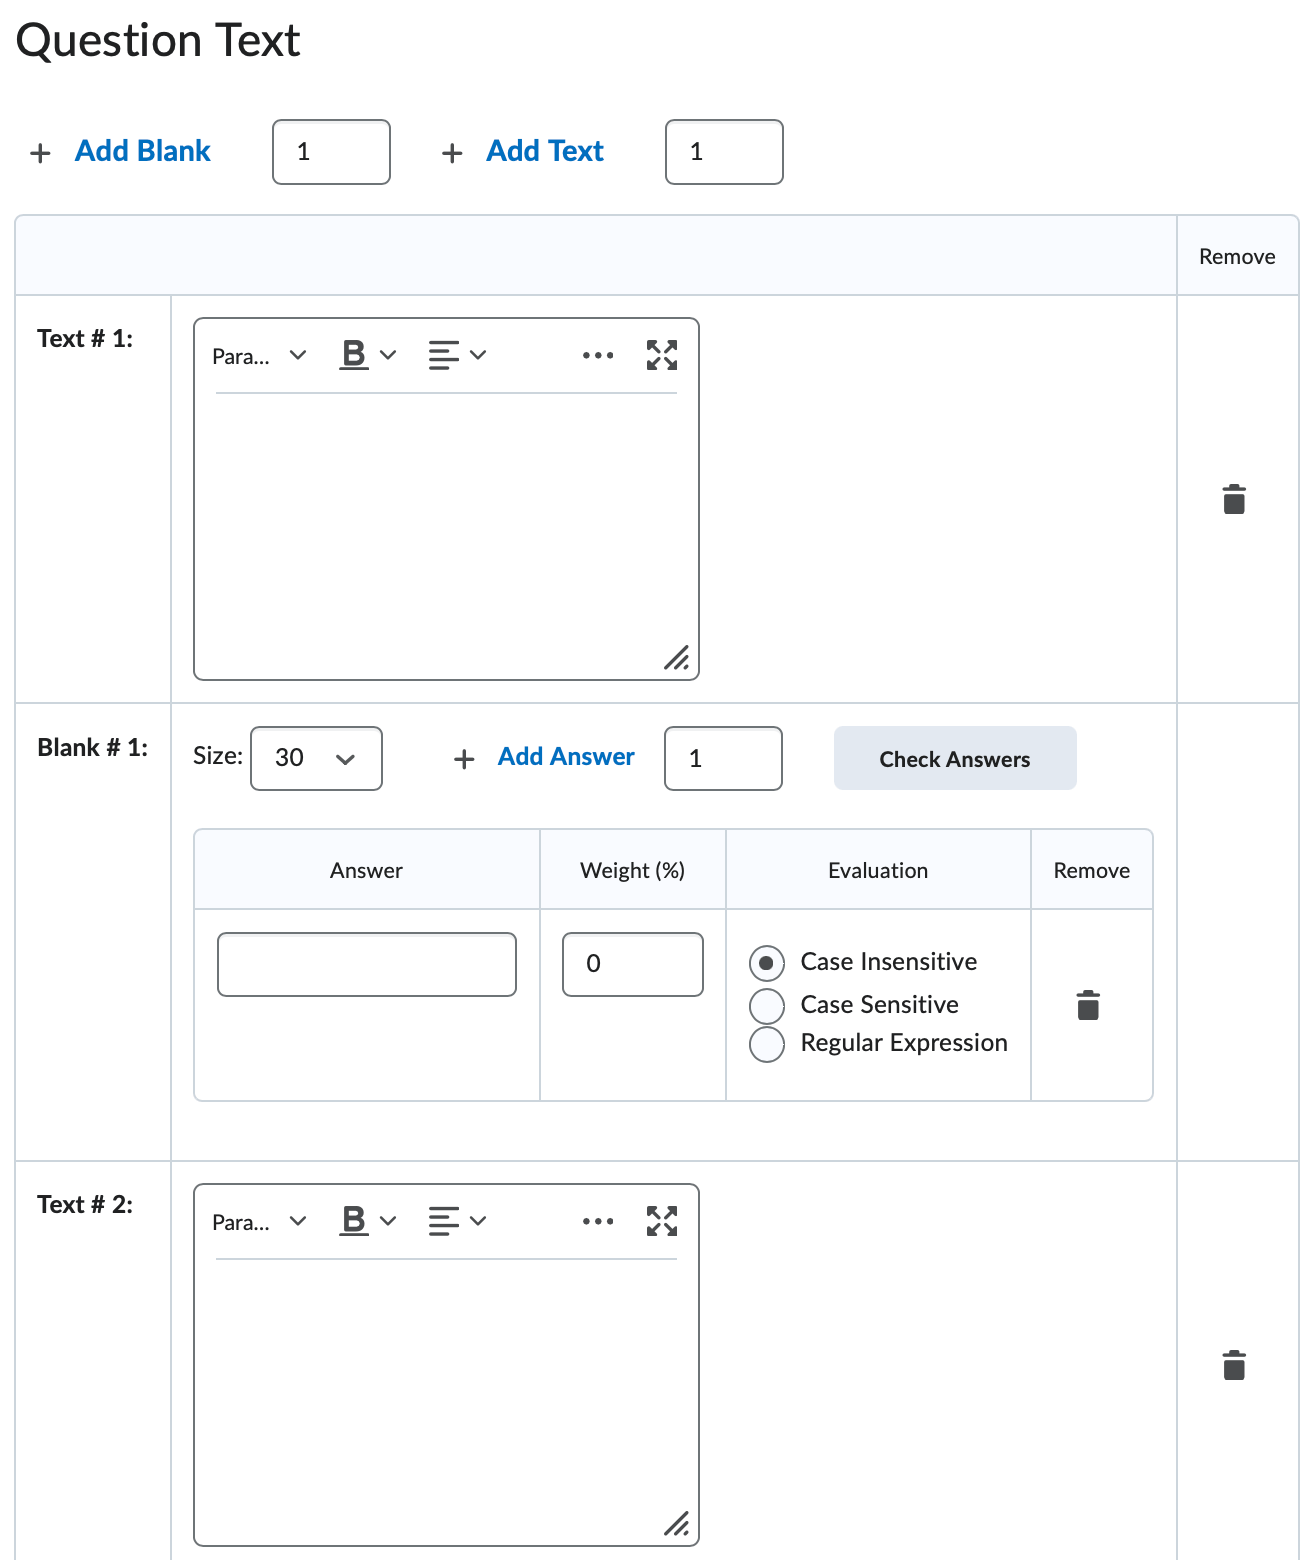
- Add Blank - Click the Add Blank button to create an empty field that a student will use to input in an answer. The
new blank will display at the end of the last item.
- Add Text - Click the Add Text button to enter text that will display before or after a blank. The new text box
will display at the end of the last item.
- Add Blank - Click the Add Blank button to create an empty field that a student will use to input in an answer. The
new blank will display at the end of the last item.
- The FIB Text and Blank Table - Note that each answer option listed in this table relates to only one Blank.
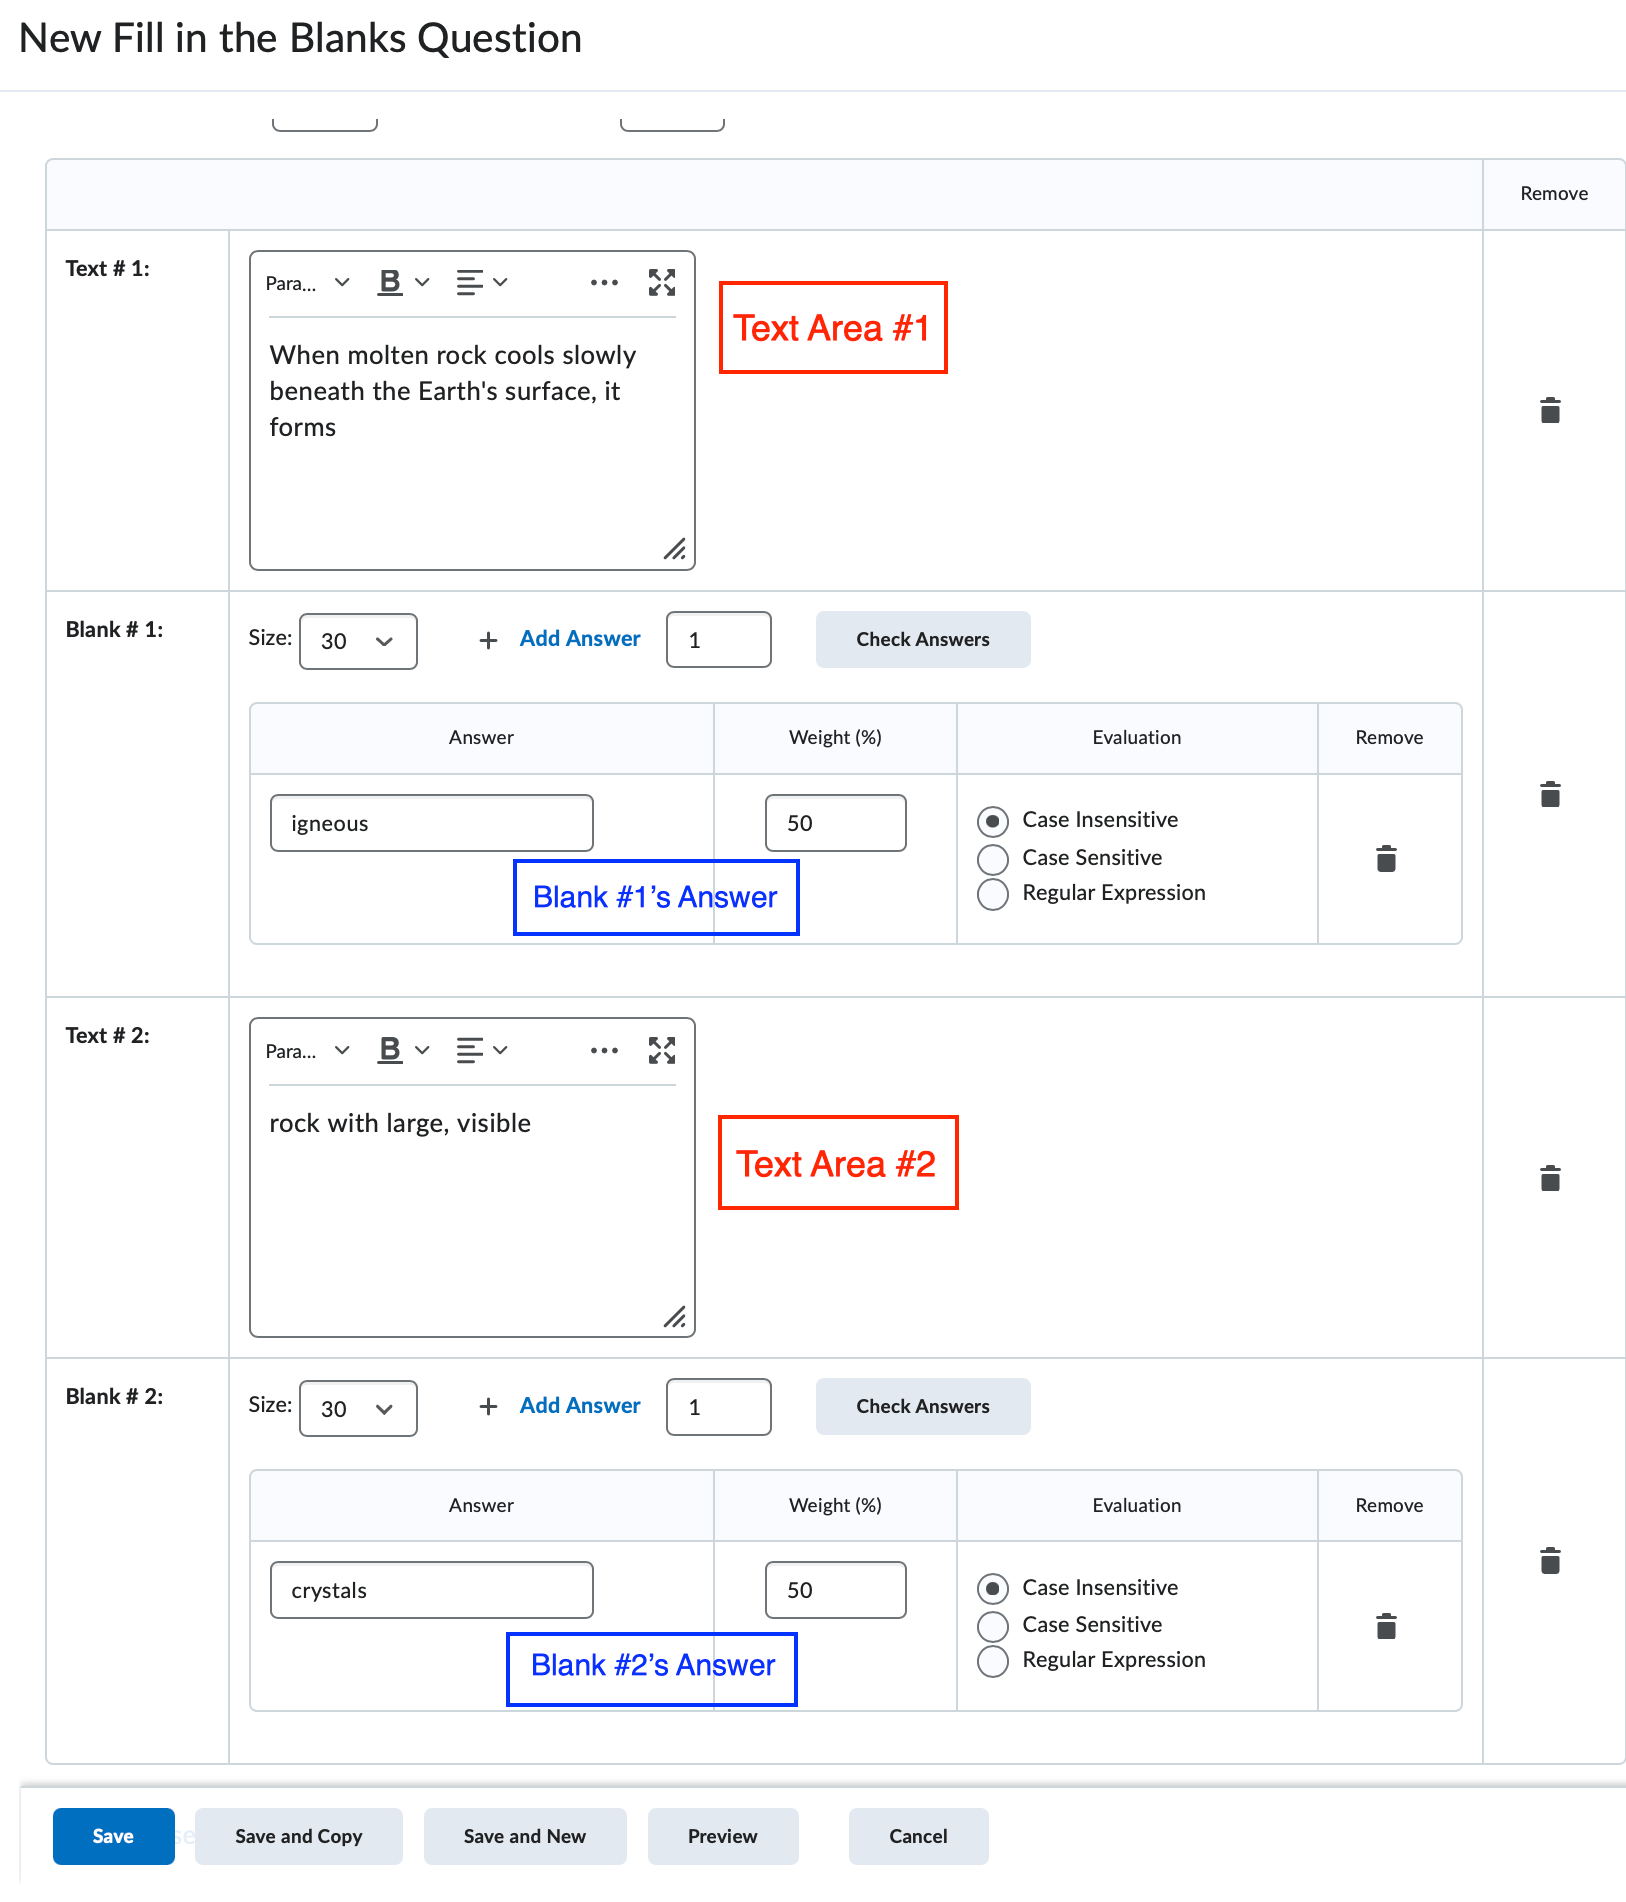
- Size - Select the number of characters from the Size dropdown to determine the size of the blank box.
- Answer - Type in the question's correct answer in the Answer box. D2L will evaluate a student's entry by using the exact spelling, spacing, and punctuation entered in the Answer box. Case Sensitivity is set in the Evaluation section.
- Weight - If your question has only one correct answer, identify that correct answers by placing a 100 in the Weight field. If you question requires more than one answer to be considered correct, distribute the weight evenly among the correct answers to ensure that the sum of the weight is 100%. Regardless of your distribution, you must ensure that the correct answer options sum to 100%.
- Evaluation
- Case Insensitive
- Case Sensitive
- Regular Expression - For assistance with Regular Expressions, contact D2L faculty support by phone: (423) 439-8616 or by email: d2lhelp@etsu.edu.
- Delete an answer option by clicking the trashcan icon.
- Optional: Enter a Question Hint.
- Optional: Enter Question Feedback.
- Choose a Save option.
-
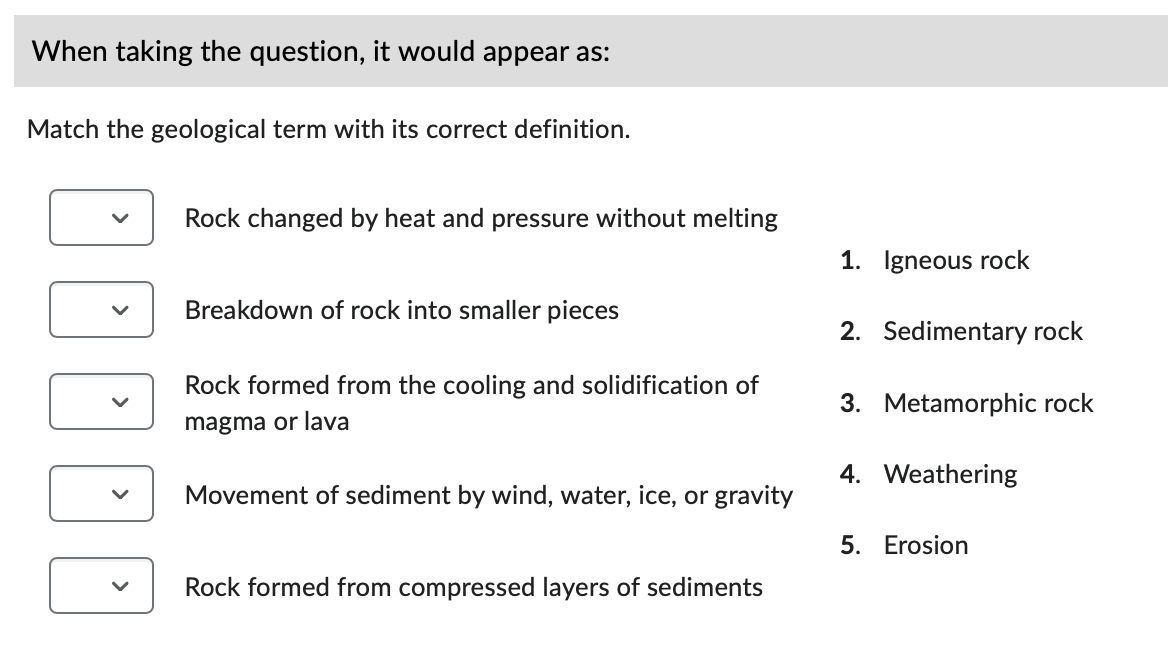
Matching
The Matching question type presents a student with a column of answer options paired with a numbered list. The student must select the correct number of the corresponding numbered list item that relates to the answer options. D2L automatically randomizes the order of the numbered list.
- Optional: Enter a question title. If you do not enter a title, D2L will inherit the first line of the question text as the Question Title.
- Points assign a value by entering a number in the Points field.
- Optional: You have the option of assigning a Difficulty level (1-5) to the question.
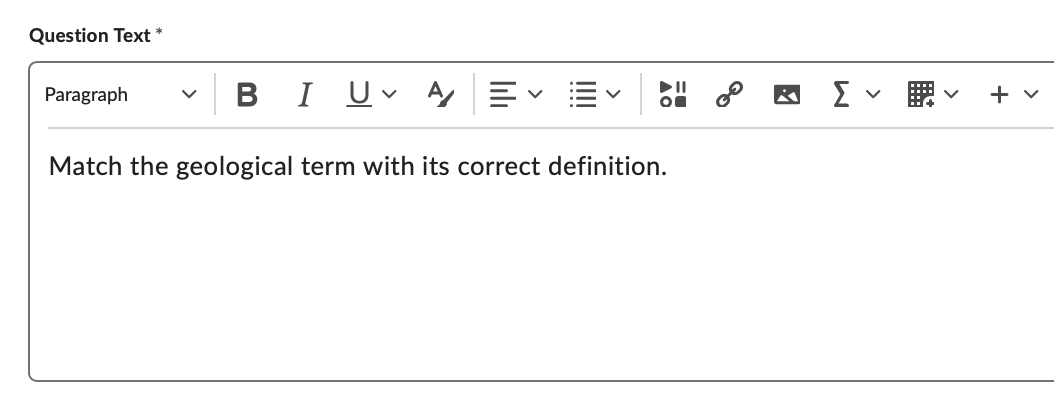
- Enter the question or question prompt in the Question Text textbox.
- Optional: Use the Insert an Image button to insert an image above your question text.
- Alternative Text – If you inserted an image, add a short description of that image in this textbox.
- Choices - Choices are the answer options provided to the student in a numbered list. Students
will select the correct answer from the list of choices.
- Grading - This option controls how D2L calculates a a question's score:
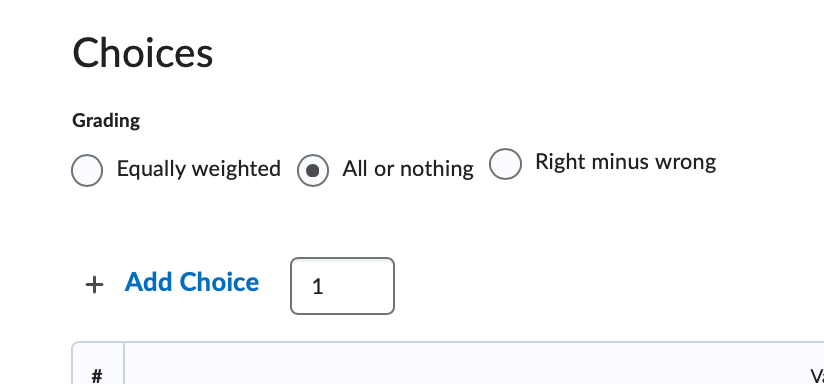
- Equally weighted - D2L will divide the question's point value evening across all possible correct matches.
- Right Minus Wrong - A student's question score is calculated by subtracting the number of incorrect answers from the number of correct answers.
- All or Nothing - Students must select all correct answer or they will receive a 0 for the question.
- Add Choice - By default D2L provides you with two choices. If your question requires more choices, use the Add Choices button to create additional rows in the Choices table.
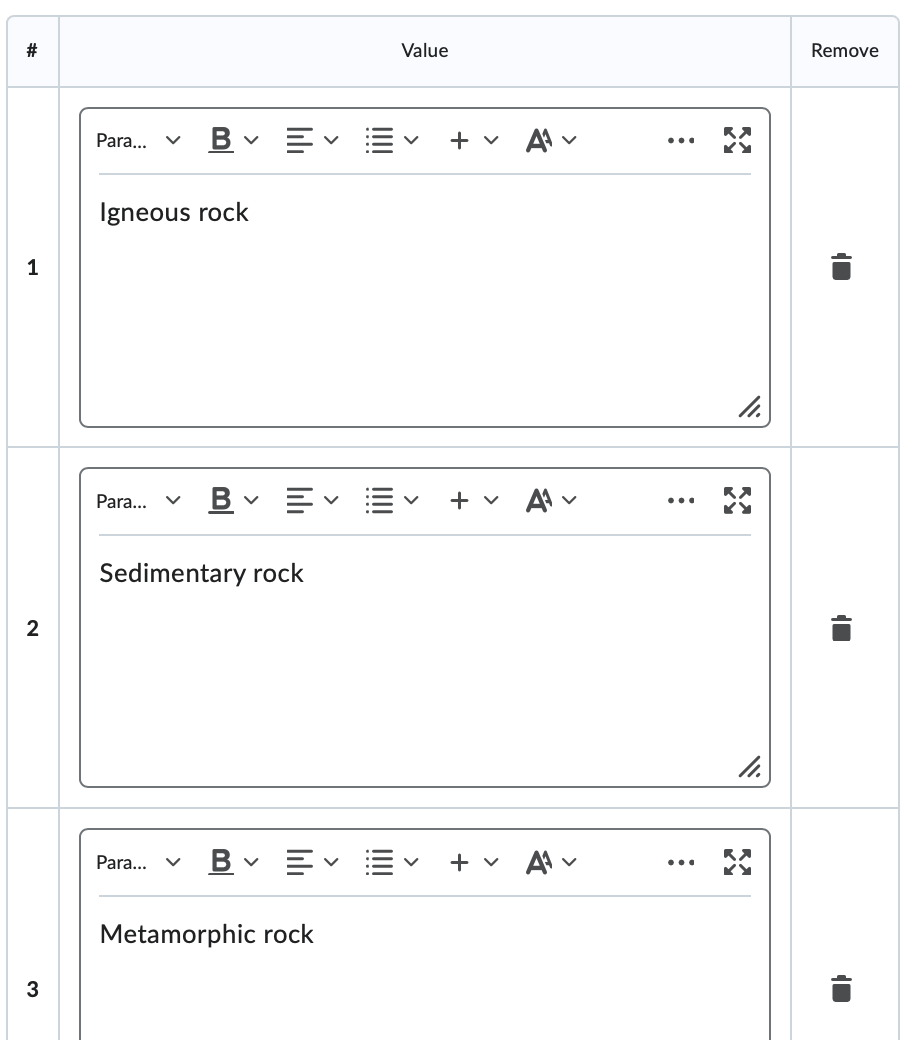
- The Choices Table - Enter one choice in each Value row of the Choices table.
- Grading - This option controls how D2L calculates a a question's score:
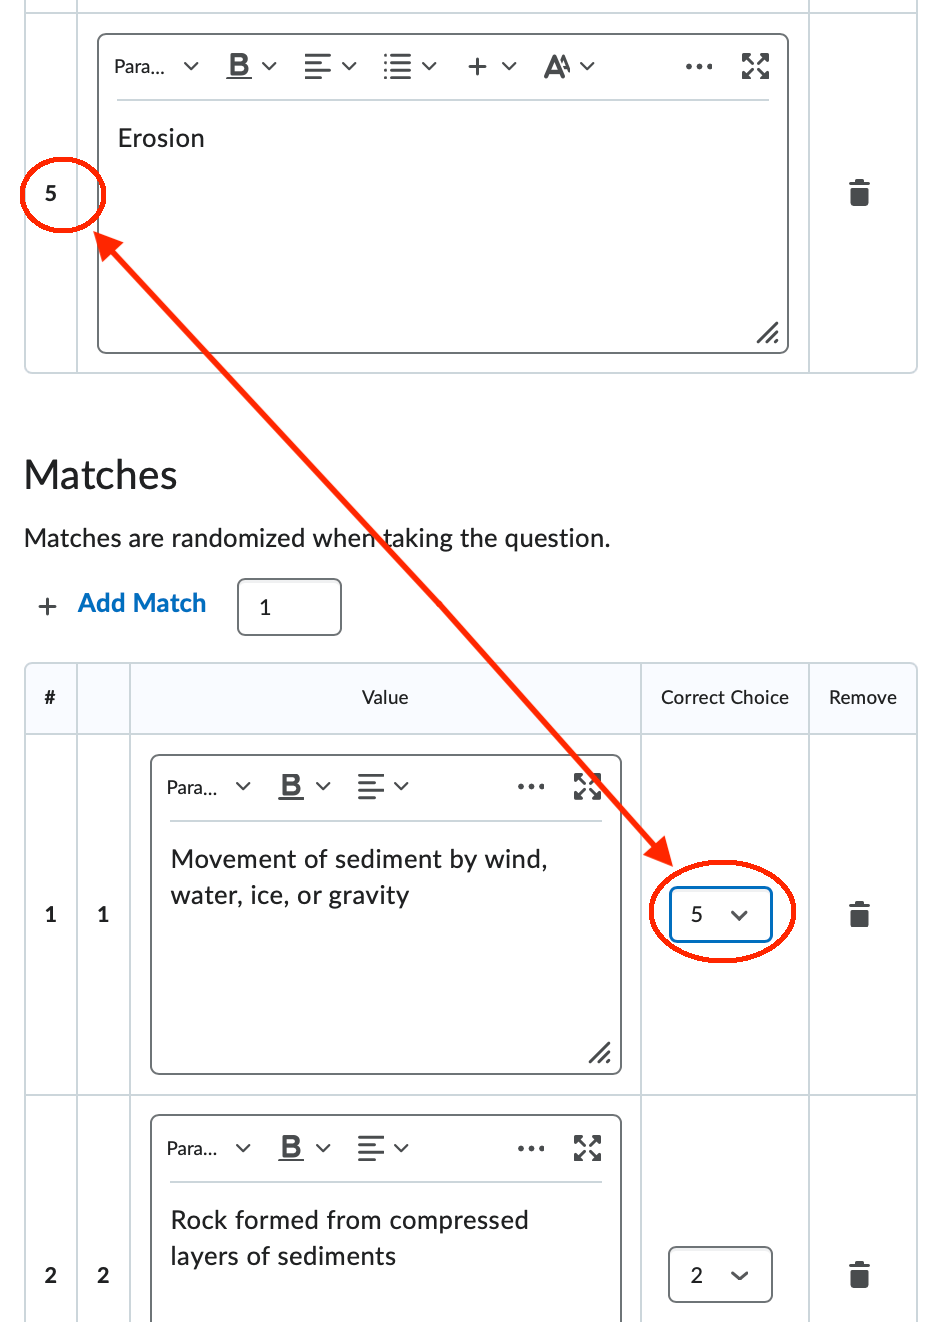
- Matches -Displayed in a randomized list on the left-side of the question, matches are the
values that students will use to help select the appropriate answer. Additionally,
for each match you must select the correct choice number that corresponds with the
choice table row.
- Add Match - By default D2L provides you with two matches. If your question requires more choices, use the Add Match button to create additional rows in the Matches table.
- The Matches Table - Enter one match in each Value row of the matches table. Then, select the corresponding choices row number in the
Correct Choice column.
- Optional: Enter a Question Hint.
- Optional: Enter Question Feedback.
- Choose a Save option.
-
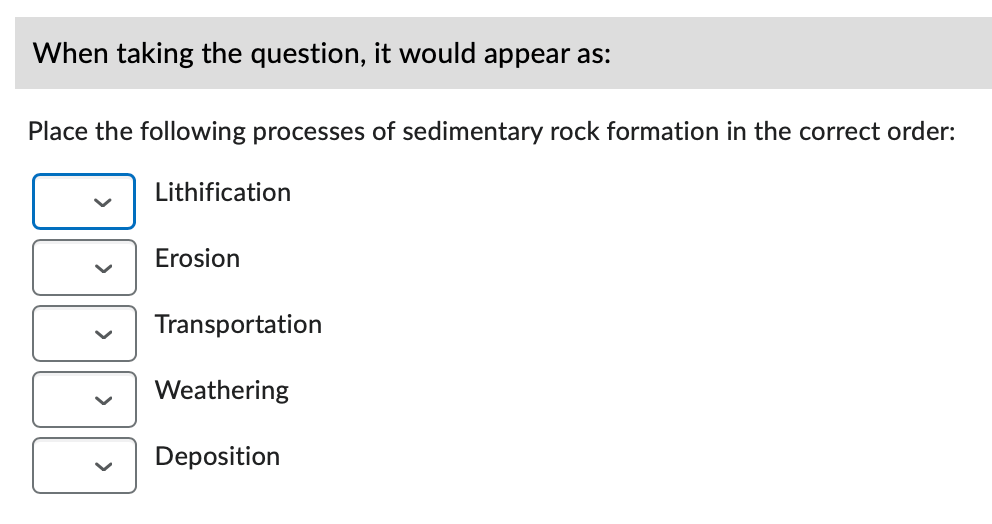
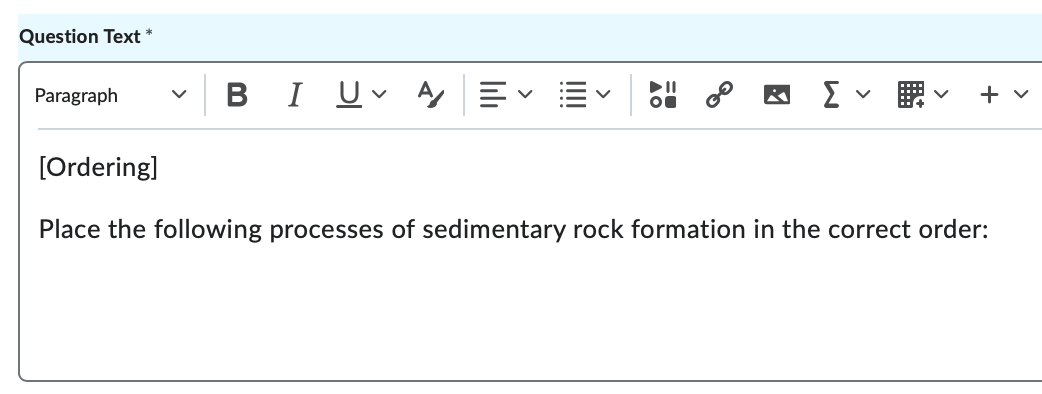
Ordering
The Ordering question type presents a student with a randomized list of terms or other values paired with a dropdown menu for each value. The student must select the correct order number from the dropdown menu for each value.
- Optional: Enter a question title. If you do not enter a title, D2L will inherit the first line of the question text as the Question Title.
- Points assign a value by entering a number in the Points field.
- Optional: You have the option of assigning a Difficulty level (1-5) to the question.
- Enter the actual question or question prompt in the Question Text textbox.
- Optional: Use the Insert an Image button to insert an image above your question text.
- Alternative Text – If you inserted an image, add a short description of that image in this textbox.
- Grading Options - This option controls how D2L calculates the question's score.
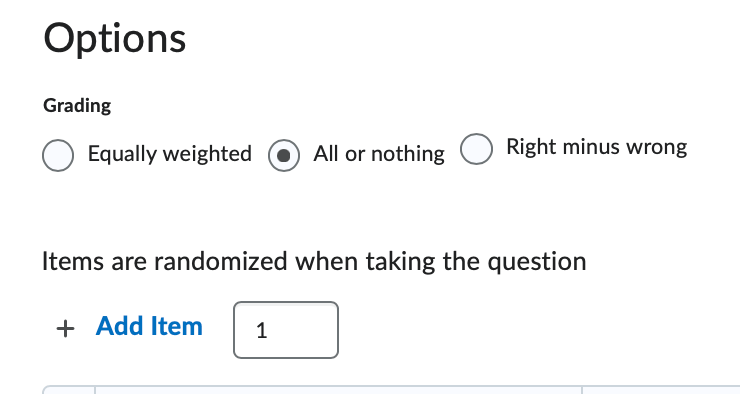
- Equally weighted - D2L will divide the question's point value evening across all possible correct matches.
- Right Minus Wrong - A student's question score is calculated by subtracting the number of incorrect answers from the number of correct answers.
- All or Nothing - Students must select all correct answer or they will receive a 0 for the question.
- Add Item - By default D2L presents you with 4 item boxes. If your question requires more items, click the Add Item button to add additional item rows.
- Item Table - Complete the item table row for each item to be included in the question's list:
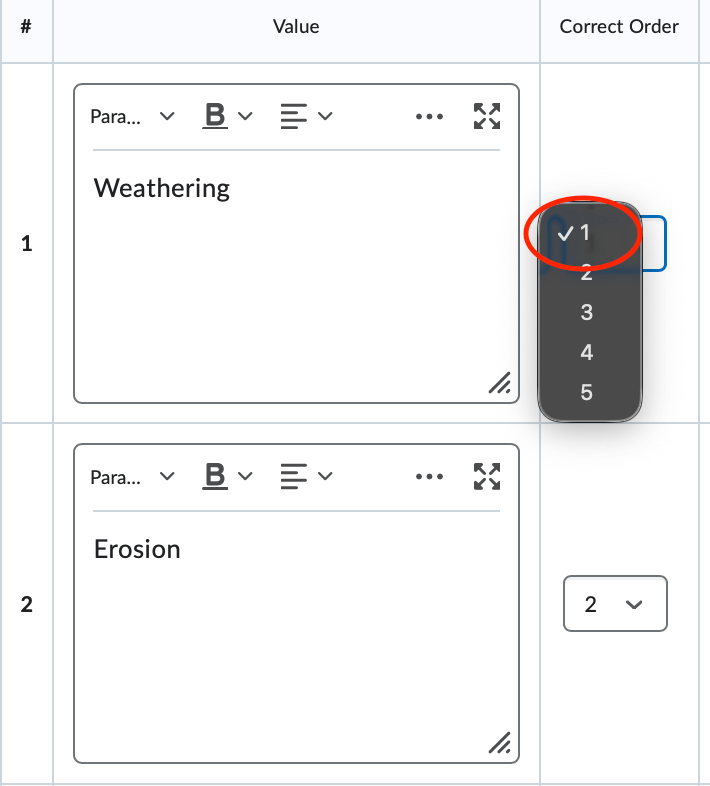
- Value - Enter the actual answer.
- Correct Order - Select the correct order number from the dropdown menu.
- Feedback - Enter any feedback that will be visible to the student.
- Remove - to delete an item row, click the trashcan icon.
- Optional: Enter a Question Hint.
- Optional: Enter Question Feedback.
- Choose a Save option.
-
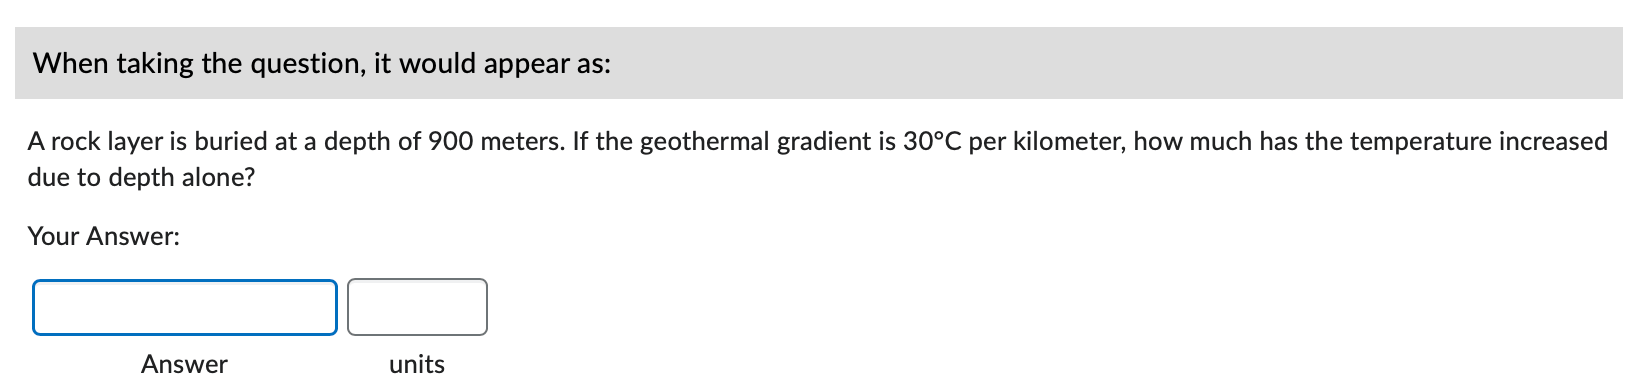
Arithmetic
The Arithmetic question type displays a question to the student that demands knowledge of mathematics theories and uses variables to create a unique question for each student that can be solved using the formula provided in the question setup.
- Optional: Enter a question title. If you do not enter a title, D2L will inherit the first line of the question text as the Question Title.
- Points assign a value by entering a number in the Points field.
- Optional: You have the option of assigning a Difficulty level (1-5) to the question.
- Enter the question or question prompt in the Question Text textbox.
Note: To display the value of a variable, ensure that the variable is enclosed in curly braces.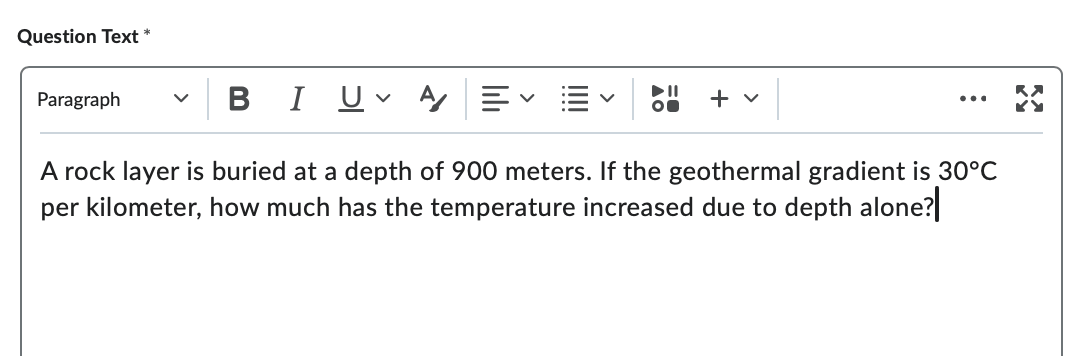
- Optional: Use the Insert an Image button to insert an image above your question text.
- Alternative Text - If you inserted an image, add a short description of that image in this textbox.
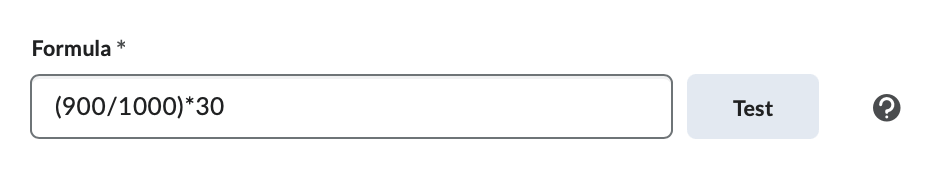
- Formula - Enter the formula D2L will use to evaluate a student's answer. Ensure that the
variable is enclosed in curly braces. Click the test button to test your formula.
- Supported Functions:
- +,-,*,/ - basic mathematical operators
- {x}^{y} - x to the power y
- abs({n}) - absolute value of n
- cos({n}) - the cosine of n (in radians)
- sin({n}) - the sine of n (in radians)
- sqr({n}) - the square root of n
- tan({n}) - the tangent of n (in radians)
- log({n}) - the log base 10 of n
- ln({n}) - the log base e of n
- The following constants are supported:
- pi - 3.14159265358979
- e - 2.71828182845905
- Supported Functions:
- Answer Precision - Define the number of decimal places you will accept for the question solution.
If you plan to enforce answer precision, ensure that the Enforce Precision option
is marked. It is a good practice to specify the precision details and expectations
in the quiz question, if applicable.
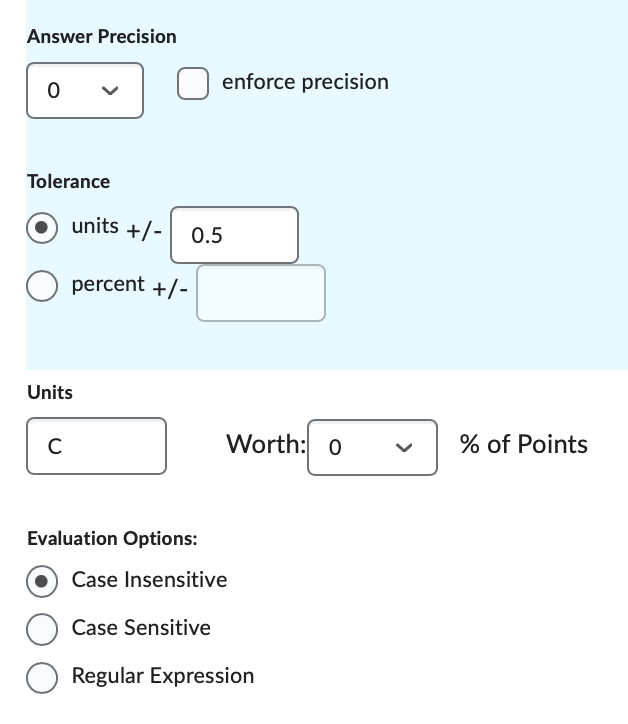
- Tolerance - Define the accuracy detail in either units (number) or percentage. For example, setting a tolerance of 0.5 on a correct answer of 27 will instruct D2L to accept any answer between 26.5-27.5 as correct.
- Units - If the correct answer requires a unit of measurement to be included in the student's answer, specify the unit here (mm, cm, grams, inches, etc). It is a good practice to specify the unit details and expectations in the quiz question, if applicable.
- Choose the appropriate Evaluation Options
- Case Insensitive
- Case Sensitive
- Regular Expression - For assistance with Regular Expressions, contact D2L faculty support by phone: (423) 439-8616 or by email: d2lhelp@etsu.edu.
- Add the appropriate Variables for the question.
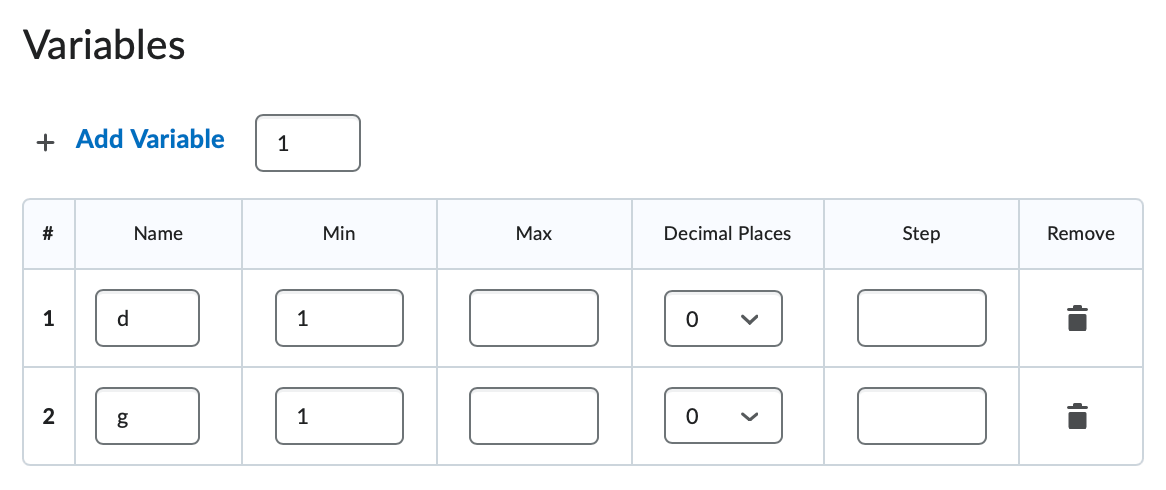
- Add Variable - If your question requires additional variables, use the Add Variable button to insert additional rows into the Variable Table.
- Name - Enter the character you used in your question and formula. You may use letters, numbers, and special characters, but be sure the variable you use matches the corresponding variable in the formula exactly.
- Min - Define the lower range number accepted for the specific variable.
- Max - Define the upper range number accepted for the specific variable.
- Decimal Places - If you would like D2L to use decimal places in the variable, select the number of decimal places here.
- Step - Enter the interval you wish D2L to use when selecting a variable.
- Remove - Click the trashcan icon to delete a variable row.
- Optional: Enter a Question Hint.
- Optional: Enter Question Feedback.
- Choose a Save option.
Creating Quizzes
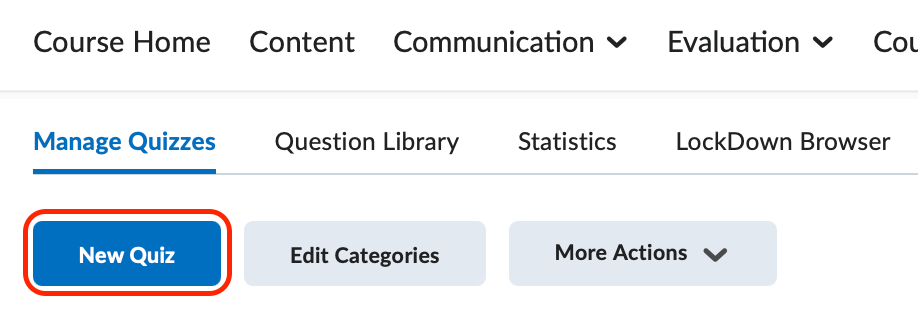
To create a new quiz, click the blue New Quiz button. You will be redirected to the Edit Quiz page. This page is divided into five sections. Each of these sections contain settings for your quiz.
When creating a quiz it is most helpful to work your way through the tabs from top to bottom. This way, you will be certain that you have completed the necessary setup before your students are allowed access. Some features of the quiz are difficult to modify once the quiz is available to your students. Confirm that your quiz is acting as you intend before releasing it to your students.
-
Edit Quiz Page
After clicking the New Quiz button you will be brought to the Edit Quiz Page. The main page holds your quiz title, points, due date, description and quiz questions. Populate all of the necessary fields on this page before moving forward in the quiz creation process.
- Enter a Quiz Title for your quiz.
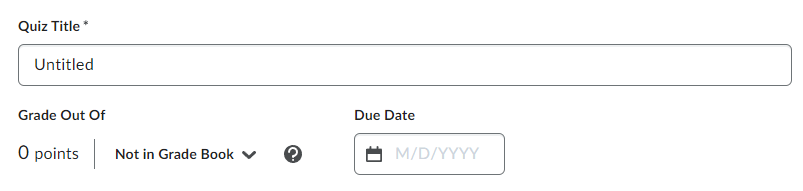
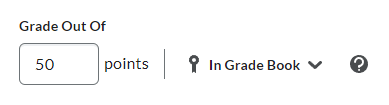
- Under Grade out Of, click on Not in Grade Book and choose the appropriate option.
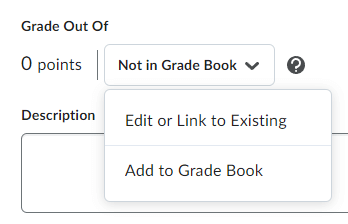
- Edit or Link to Existing - if you have already created the grade item in the grade book, select this option. Then select the radio button next to link to an existing grade item and select the appropriate grade item.
- Add to Grade Book - if you have not created a grade item for this quiz, select this option to automatically add a grade item with the same name to the grade book. Note, this will create a duplicate if you already have an item with the same name in the grade book.
- Optional: Enter a due date and time for the quiz. This due date will show up for students on the upcoming events section of the course homepage.
- Optional: Enter information into the Description section. Information entered in this textbox will appear to the student on the Quiz Summary page, before the student begins the assessment.
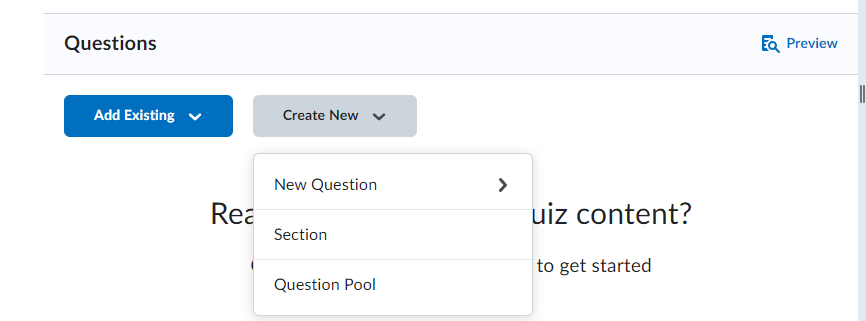
- Click the Add Existing button to select questions created through the question library. Click on Create New if you need to create new questions for the quiz or if you are building a question
pool. Information about creating quiz questions can be accessed on the Creating Questions
tab.
- Click Save and then navigate to the Availability Dates and Conditions section.
- Enter a Quiz Title for your quiz.
-
Availability Dates and Conditions
This section holds all information regarding when and how students access your quiz.
- Optional: If you are planning on setting start and end date and time parameters, set the date
and time in the Start Date and End Dates section:

- Start Date - sets the earliest date and time that a participant will be able to begin the quiz. To set a start date click on the calendar icon and set a date and time.
- End Date - sets the latest date and time that a participant will last be able to begin the quiz. To set an end date click on the calendar icon and set a date and time.
- Select Add availability dates to Calendar to have your start/end dates automatically synced to the course calendar. Note, Start and End Dates do not control a quiz's time limit. These dates control the availability of the Start Quiz button.
- Release Conditions- Creating release conditions control which criterion students must meet in order for
D2L to release the quiz to that student. For more information about release conditions,
visit the Release Conditions page.

- Special Access -To provide specific participants with availability and time limits for the quiz that
are different from the rest of the class, click the Add User to Special Access button.
Use this feature for students who require longer examination times or for students
who missed the initial quiz dates.
- Allow selected users special access to this quiz - Selecting this radio button will allow students with special access to open the quiz outside of the regular restrictions you set previously without affecting the rest of the class and their access.
- Allow only users with special access to see this quiz - Selecting this radio button will allow ONLY students with special access to open the quiz outside of the regular restrictions you set previously. Your remaining classlist will NOT be able to access the quiz.
- Password- Create a case-sensitive password that students must enter in order to gain access
to the quiz.
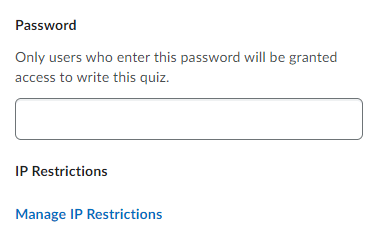
- IP Restrictions- Restrict your students to a specific IP range This feature is useful if you have worked with a specific testing center with static IP addresses assigned to the machines. Please do not enter an IP range unless you have verified that the range is static. If using IP address restrictions, the first box must contain the starting numbers of the IP address range. Each additional field is optional depending on how specific you want the IP address restrictions to be.
Navigate to the Timing and Display tab when ready.
- Optional: If you are planning on setting start and end date and time parameters, set the date
and time in the Start Date and End Dates section:
-
Timing and Display
The Timing and Display section has the settings that enable you to add a time limit and set display options for your D2L quiz. With the proper configuration, D2L will set up safe guard options for the display of your quizzes to students.
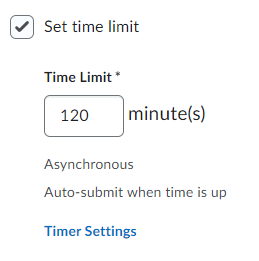
- Enter the time limit, in minutes, you want to allow students to have to complete the quiz. D2L will automatically
set the time limit to be asynchronous and auto-submit when time is up. Click on Timer Settings to adjust these settings to your preferences.
- Quiz Start - determines the type of quiz
- Asynchronous - students can take the quiz at any time within the start and end date period for the quiz.
- Synchronous - students must take the quiz at the time of the start date. The start date and time entered in the Availability and Conditions will prompt the quiz timing to begin for students.
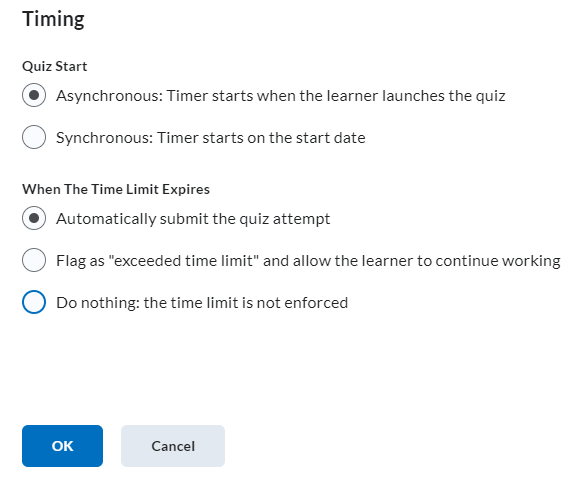 When the time limit expires - determines how the quiz
- Automatically submit the quiz attempt - automatically submits the quiz on behalf of the student once the time limit is up.
- Flag as "exceeded time limit" and allow the learner to continue working - allows students to continue in the quiz until they finish and submit the quiz. You will see a flag on student's submissions with the amount of time over the time limit they took to complete the quiz.
- Do nothing: the time limit is not enforced - allows students to keep working after the time limit is up and will not flag their submission for going over the time limit.
- Quiz Start - determines the type of quiz
- Paging - Limits the number of questions displayed on the quiz to students at one time.
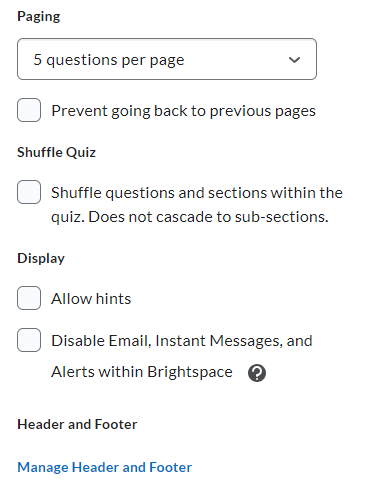
- All questions displayed together - displays all questions to students on the same page.
- 1 question per page - limits the display to show only one question per page as a student progresses through the quiz.
- 5 questions per page - limits the display to show only five questions per page.
- 10 questions per page - limits the display to show only ten questions per page
- Add page break after each section - adds paging after students complete a section set up in the quiz questions. Note, this is only applicable if you have multiple sections set up in your questions area.
- Prevent going back to previous pages - if you limit the amount of questions displayed per page, you can check this box to prevent students from going back to previous pages to check or change answers.
- Shuffle Quiz - To shuffle questions and sections in the quiz, check the box here to shuffle questions and sections within the quiz. Note, If you have a series of questions that need to be displayed in a specific order, do not select this option.
- Display - To limit the information displayed or accessible to students during the quiz select
one or both of the following options.
- Allow Hints - checking this checkbox will make available question hints to your students while the students are taking the assessment. Note that you populate question hints inside of the quiz question setup.
- Disable email, instant messages, and alerts within Brightspace - If you turn on this option, users cannot access these tools or their alerts if they have a quiz attempt in progress. Note that this option is also activated when an instructor previews an assessment.
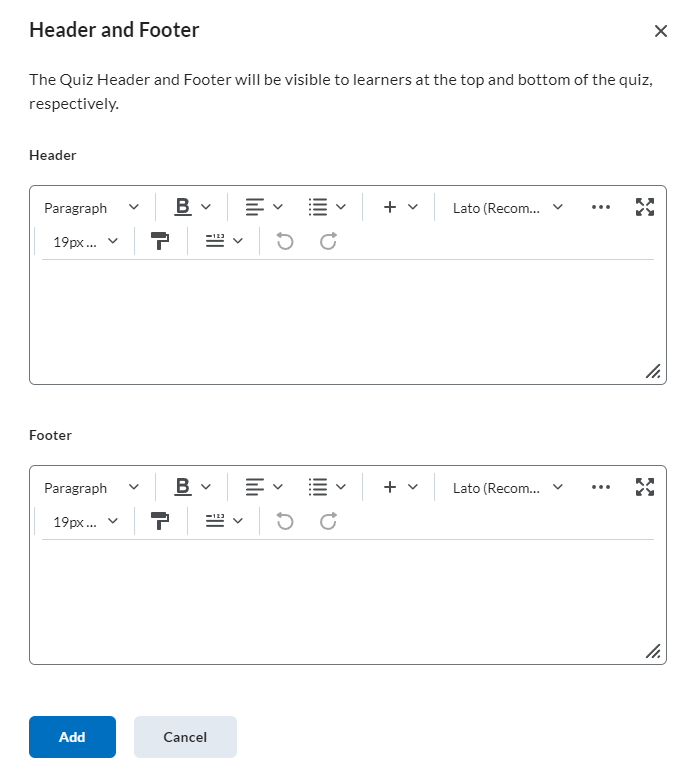
- Header and Footer - Information entered in these textboxes will appear to the student along the top and/or
bottom of the quiz question page(s).
- Click on the Manage Header and Footer button, and enter information into the Page Header and Footer sections. Note that if you choose to populate either of these fields, they are different from the quiz description.
Navigate to the Attempts and Completion section.
- Enter the time limit, in minutes, you want to allow students to have to complete the quiz. D2L will automatically
set the time limit to be asynchronous and auto-submit when time is up. Click on Timer Settings to adjust these settings to your preferences.
-
Attempts and Completion
The Attempts and Completion section allows you to manage the number of attempts students have for the given quiz. D2L also allows you to categorize your quizzes and get notification emails when a quiz is attempted by students.
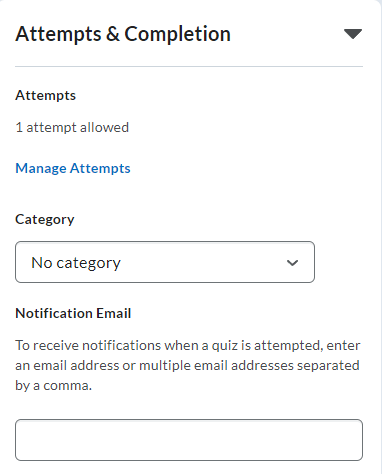
- Set the number of attempts that each student is allowed to have to complete the quiz. By default, D2L allows
one attempt for a quiz.
- To adjust the attempts allowed, click on Manage Attempts.
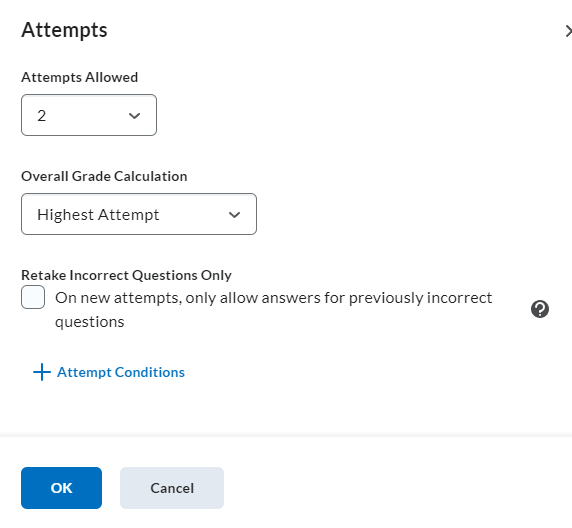
- To adjust the attempts allowed, use the dropdown arrow to select the new number of attempts.
- If the number of attempts is greater than 1, please select the overall grade calculation method.
- If the number of attempts is greater than 1, decide if you want to restrict the new attempt to Retake Incorrect Questions Only. This will display only the questions students answered wrong on the first attempt. Note, do not select this option if you want students to get a completely different set of questions on the subsequent attempts.
- To adjust the attempts allowed, click on Manage Attempts.
- Change the category if you are categorizing your quizzes by topic or type.
- Notification email - The email address or comma-separated list of email addresses specified in this field will receive an email message every time a student completes a quiz attempt.
- Set the number of attempts that each student is allowed to have to complete the quiz. By default, D2L allows
one attempt for a quiz.
-
Evaluation and Feedback (Submission Views)
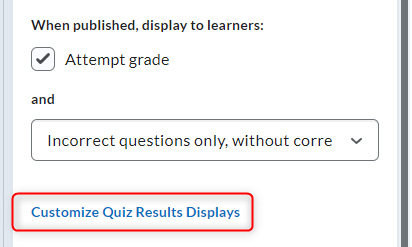
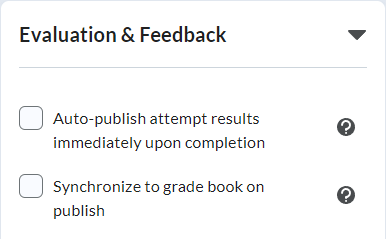
The Evalution and Feedback (Submission Views) section controls what the student sees once they submit an assessment. By default, the student sees only a published score. If the Auto-publish attempt results is unchecked, the student may not see their grade. Click on the Customized Quiz Results Displays button to configure the students' Submission View and feedback.
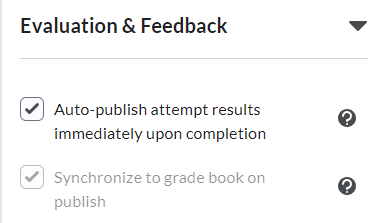
- If you've selected a grade item from the grade out of section, checking the Auto-publish attmpt results immediately upon completion checkbox will publish the grades for students to view immediately after they have completed their quiz attempt. Note, this will only display the score of what D2L can autograde. Other grade items will need to be added manually for this to update.
- Synchronize to grade book on publish will automatically send graded quizzes to the grade book. Note, if this box is unchecked, grades will not synchronize with the grade book appropriately. It can be left unchecked and checked at a later time to delay the release of the grades to students for their quiz attempt.
- To set up a submission view for students, change the option under When published, display to learners:
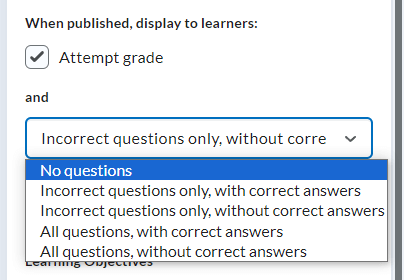
- Either leave the No Questions option selected or change the option in this dropdown section to show the exam questions
to the student with or without the correct answers. If you selected to show students
questions, choose from one of the following options:
- Incorrect questions only with correct answers - This option will display only those questions the student answered incorrectly with the correct answers.
- Incorrect questions only, without correct answers - This option will display only those questions the student answered incorrectly without displaying the correct answers.
- All questions, with correct answers - This option will display all questions with the correct answers.
- All questions, without correct answers - This option will display all questions without displaying the correct answers. (For example, they will see the answer they selected and can see if they got it correct or 1/1 points for the question or if they got it wrong and got 0/1 points.)
- To customize the submission view for students, click on Customize Quiz Results Displays. Then click Edit View on the next screen.
- There are several view options you can change.
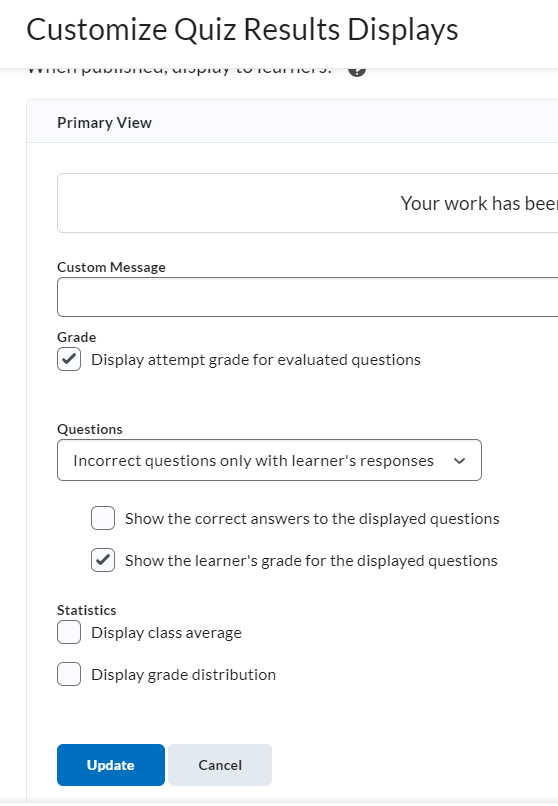
- Alter the Custom Message field to display a confirmation message to students. This message is a great opportunity to communicate the turn-around time for feedback and/or quiz results.
- Grade - Checking this box will display the student's overall quiz grade. The Grade option is the only option checked by default.
- Questions - Select if you want to display the questions with or without correct answers to students.
- Show the correct answers to the displayed questions - Checking this box will display the correct answer for every question displayed.
- Show the learner's grade for the displayed questions - Checking this box will display the max point value of a question with the number of points a student achieved. This option is relevant for written response questions where the student may receive partial credit.
- Statisitics - If you wish to show the class average or grade distribution, check the related checkbox.
- Click Update to return to the Customize Quiz Results Displays page.
- Optional: Click the Add Additional View button to create a separate submission view to be released on a future date. This
option is most relevant if you want to delay the release of all quiz questions and
answers until after the testing window closes.

- Next, you can select OK and then Save and Close and the assessment should function without any issues.
- Continue to the Learning Objectives section to connect this assessment to a competency structure. If you would like assistance with the Learning Objectives section or setting up submission views, please contact D2L Faculty Support at 423-439-8616 or d2lhelp@etsu.edu
-
Creating a Question Pool
Create a Question Pool
Creating a question pool begins in the Question Library. You must have all questions populated in the
question library so that you can import the questions into your question pool. Follow these steps to create
questions in the question library and then import those questions into a pooled section within a quiz.
Creating a Section of Questions in the Question Library
- Navigate to the Assessments tool by selecting Assessments from the Evaluation link group located in the default course navigation bar.
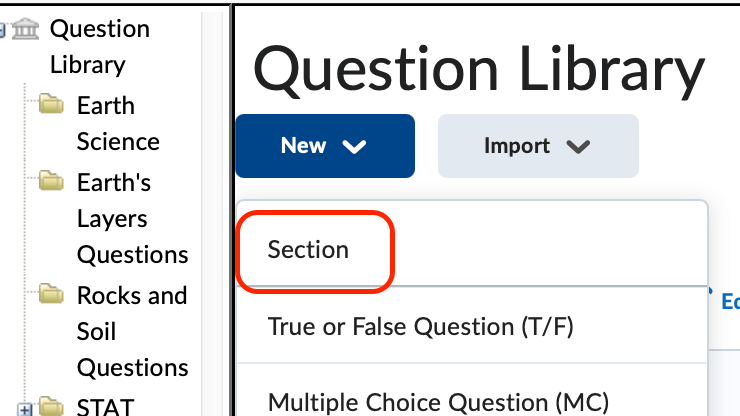
- Click Question Library.
- Click the New button and choose Section. In D2L, sections act as folders for the organization of
assessment questions. These section folder can organize questions by chapter, topic,
or other methods.
- Give your section a title and then click Save. This action will return you to the Question Library.
- Locate the section you just created and click on its name to open it.
- Click the New button and select a question type.
- Complete the question creation process and click Save when finished.
- Create your question(s) within this folder. When you’re finished, click Done Editing Questions.
- This action will return you to the Manage Quizzes page.
Create a Question Pool inside a Pre-existing Quiz
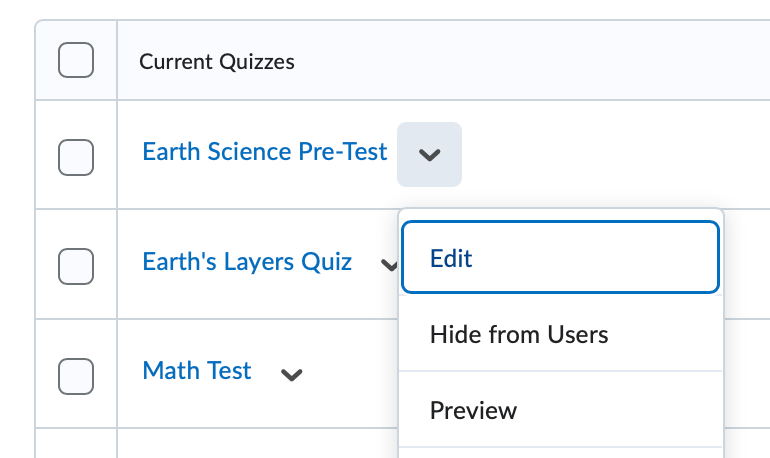
- From the context menu of a preexisting quiz, select Edit.
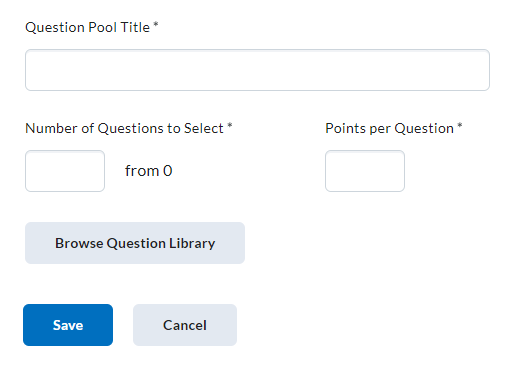
- On the Edit Quiz page, locate and click on the Create New button and select Question Pool.
- Give your question pool a title. Note that your students will not see the name that you give the pool, only the questions
in the folder. After entering the title click the Browse Question Library button.
- This will open a list of the questions you have in your question library. Check the
square next to the group of questions you want to include. You can even choose individual
questions by clicking on the triangle to expand your list. Once you have selected
your questions, click Import. Questions within this list will be randomized to your students.
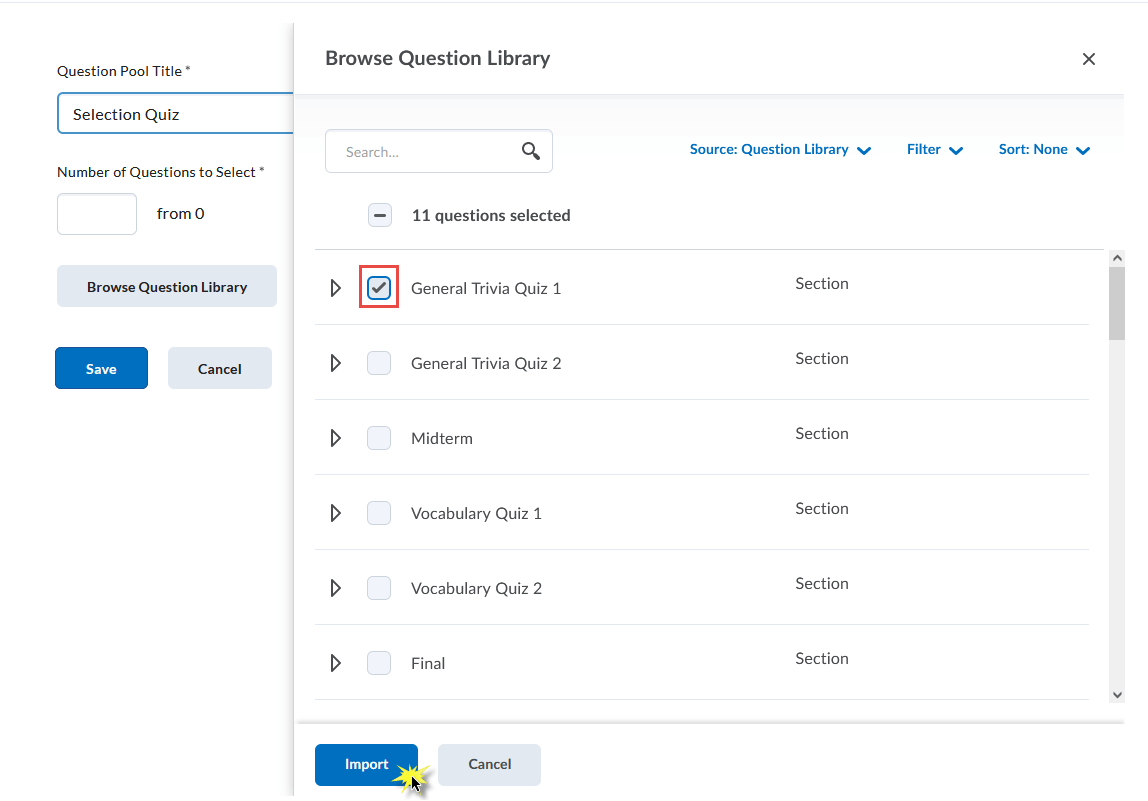
- Once you have clicked the Import button – you must choose how many questions you want to use out of the pool and the
point value for each question.

- Click Save. This action will return you to the main Edit Quiz page of the quiz.
- Continue setting up the quiz with your desired setting and click on Save and Close to save your changes.
- Navigate to the Assessments tool by selecting Assessments from the Evaluation link group located in the default course navigation bar.
-
Respondus Lockdown Browser
To enable LockDown Browser, click on the new LockDown Browser tab at the top of the quiz menu.
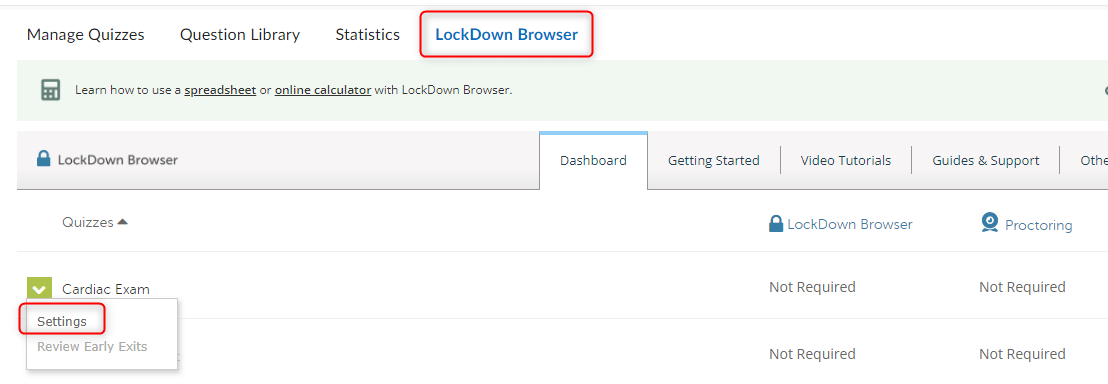
- Once inside the Lockdown Menu, click on the dropdown arrow and select Settings on the quiz you wish to restrict.
- Select the radio button to Require Respondus Lockdown Browser for this exam.
- Once inside this menu, adjust the settings for your preferences. Click on Advanced Settings if needed to view additional settings for the Lockdown Browser.
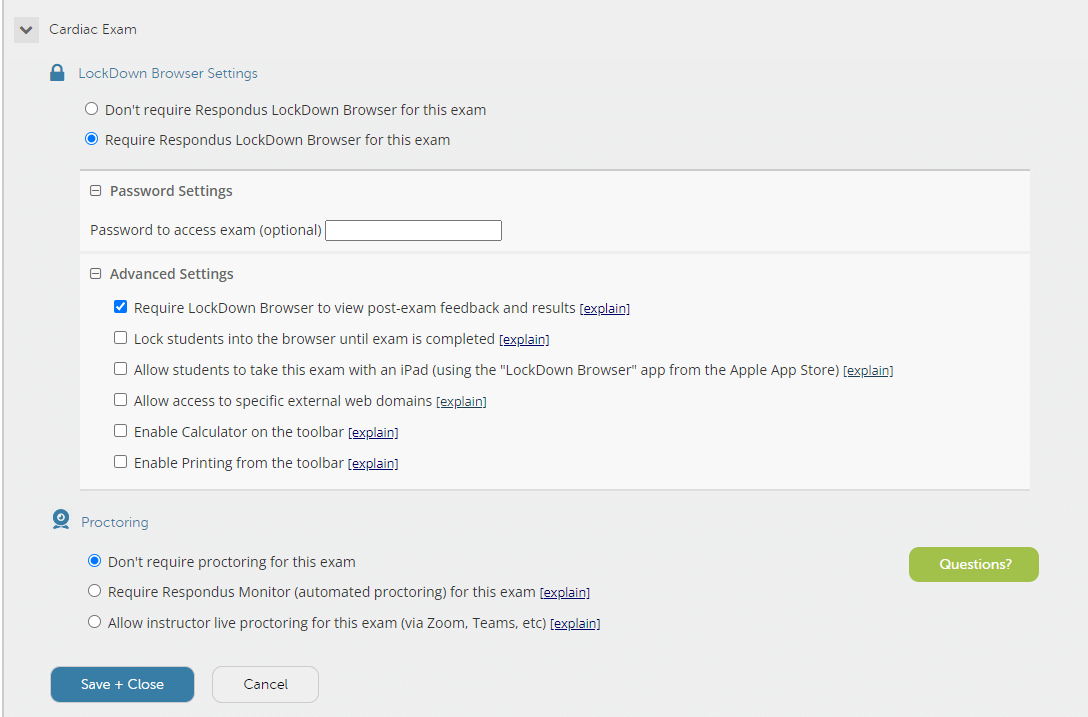
- Optional: enable Respondus Monitor (Proctoring) for the exam. Monitor requires students to have a webcam and record
themselves while taking a non-proctored quiz. Recordings from the quiz will be available
in the Lockdown Browser tab of the assessments page.
- There is also a live, synchronous proctoring option available. This can be done via Zoom or Teams. Note, this is only recommended for smaller class sizes and isn't recommended for students completing quizzes on iPads.
- Click Save and Close once complete. Note, students will not be able to take the test in the Testing Center, unless you remove the IP Restriction.
Grading Quizzes
The Manage Quizzes screen not only displays and organizes your quiz list but it also gathers information about how your quiz grading is progressing. From this page you are able to capture, at-a-glance, the number of students who have completed an assessment as well as the number of those attempts that D2L has published. If you remember from the previous section, D2L automatically grades all objective question types. As an instructor, you have the ability to control what D2L does with those graded quizzes. Refer back to the Evaluation and Feedback section of Creating Quizzes for more information.
The example scenarios below illustrate the workflows used for a quiz that includes a written response or other manually graded question type. If you remember, D2L cannot automatically grade written response questions. So, once we grade the written response question, we want that quiz grade to export to the gradebook.

The Manage Quizzes page contains the quiz list table. The far right column of the quiz list table, the Published column, contains the following information:
- The denominator (the bottom number of the fraction) tells the instructor how many attempts have been completed.
- The numerator (the top number of the fraction) tells the instructor how many of those attempts
are set as published.
- Remember, only published scores can be exported to the gradebook. If you see a fraction in the published column with a 0 as the top number, you will automatically know that no grades have been sent to the gradebook.
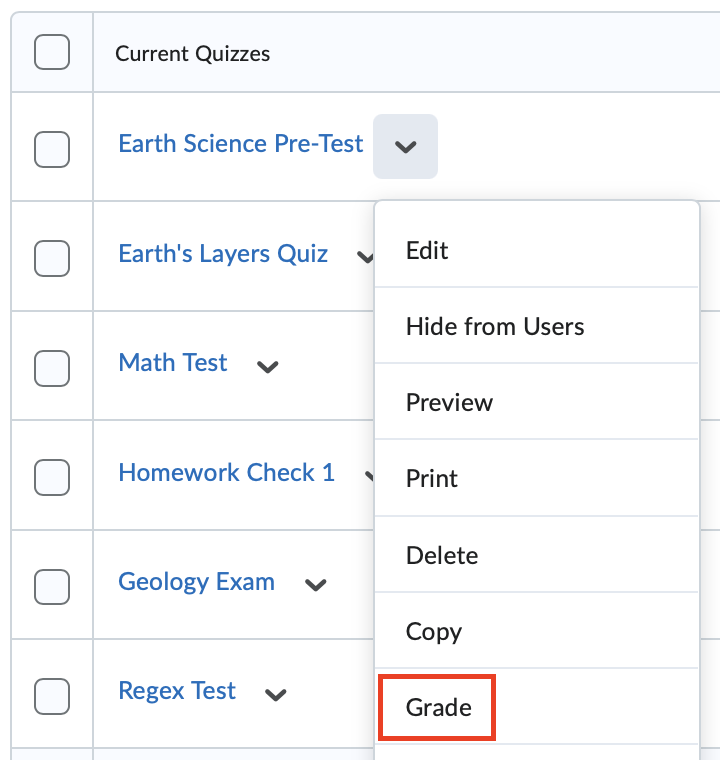
To access the Grade Quiz area, click Grade from a quiz's context menu.
The Grade Quiz page contains three different grading/viewing options: Users, Attempts, and Questions. The default view of the Grade Quiz page is the Users view.
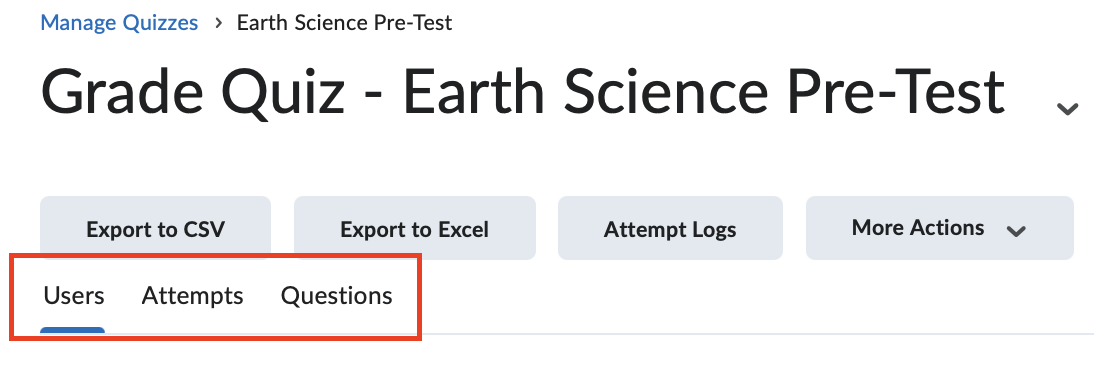
- Users - The Users view will display all completed attempts by a student's first and last names.
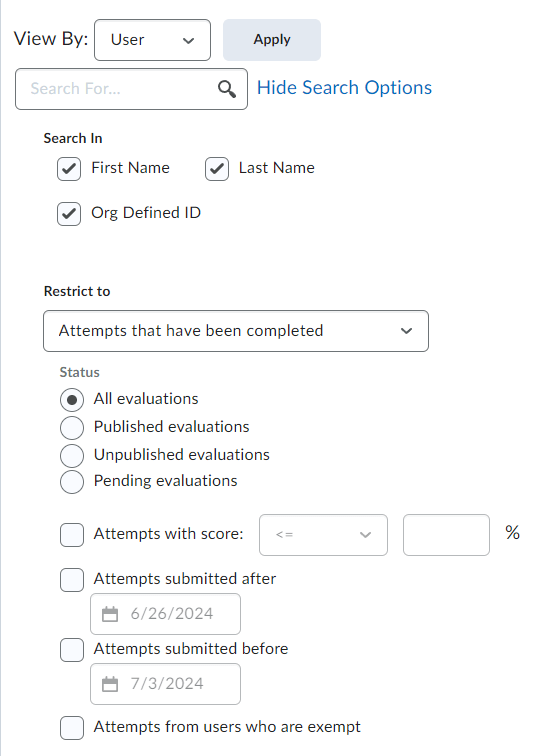
- Attempts - The Attempts view will display all completed attempts and give you the option of filtering the attempts by graded/ungraded, by score, and by date.
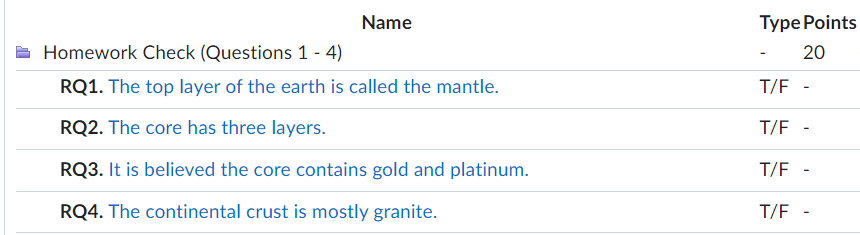
- Questions - The Questions view will allow you to grade quiz questions individually. This option is helpful when the quiz may contain mostly objective questions with only one or two subjective (essay) question. Instead of opening each student's attempt, finding the essay question, and assigning a grade, the Questions tab workflow will allow you to open the essay question for ALL STUDENTS, giving you the option of scoring only that essay question for each student on a single screen.
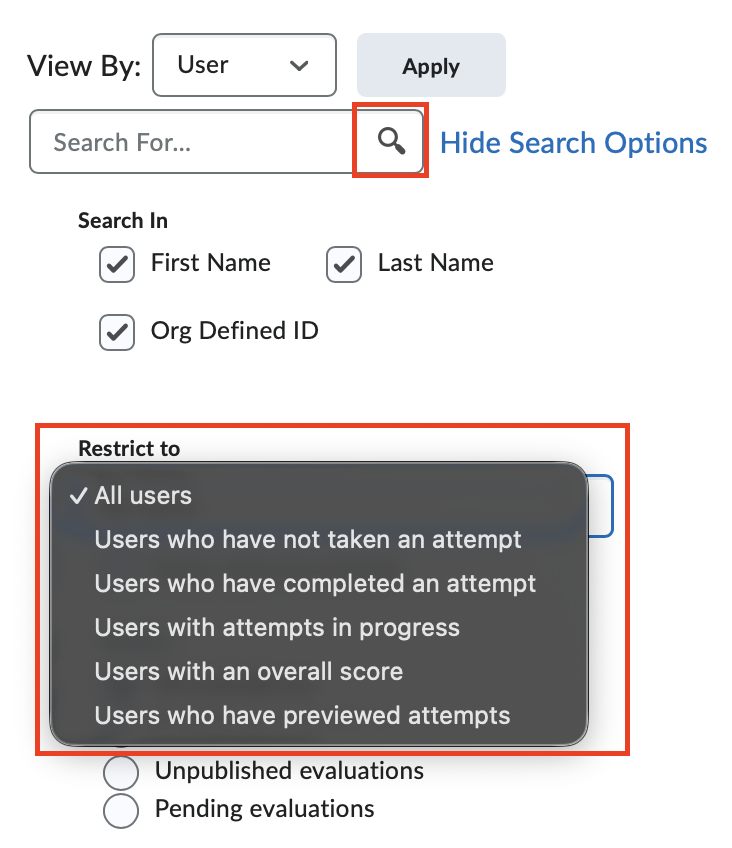
You can change the filtering/viewing options by selecting a different option from the Restrict to dropdown menu and then clicking the magnifying glass found within the Search For textbox.
Choose a scenario below to see how an instructor should manually grade a quiz in D2L and then export that grade to the gradebook.
-
Students who have Completed an Attempt
From the Users Tab
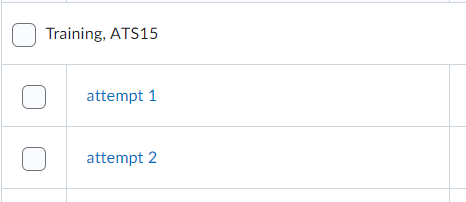
- From the Users tab of the Grade Quiz page, scroll to find a student within the attempts table.
- Click the Attempt hyperlink for that particular student.

- If applicable, select the appropriate attempt for the selected student in the Attempt list.
- Optional: Click the Event Log hyperlink to display a pop-up window containing timestamped information for a student's
quiz progression.
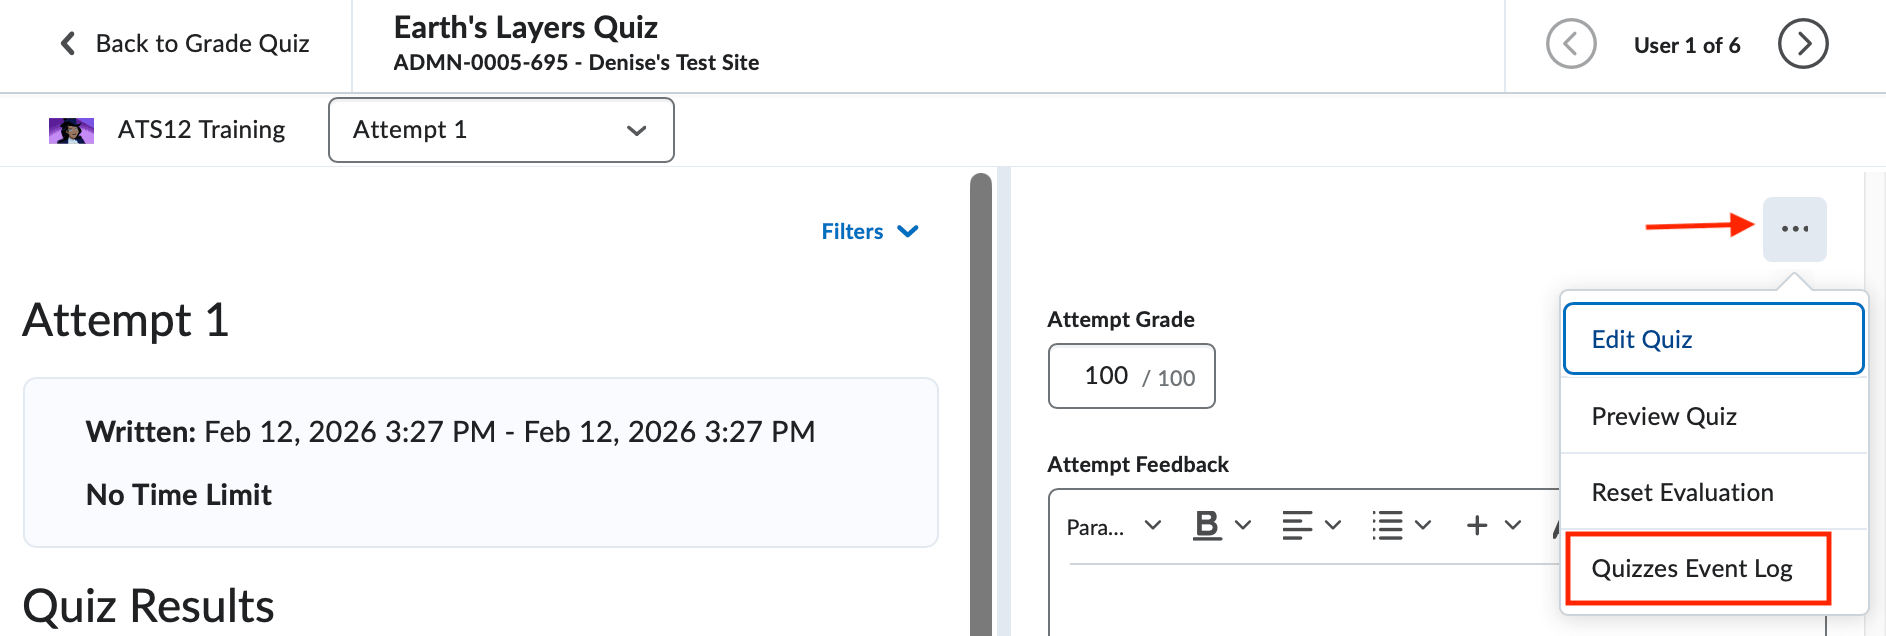
- Optional: The Attempt Grade textbox is auto-calculated by D2L, but you may override this score, if necessary.
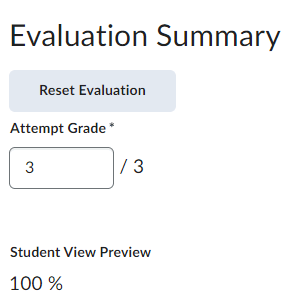
- Optional: The Update button in the bottom right corner publishes the quiz attempt grade or any manual updates made so that it can be exported to the gradebook.
- Optional: Enter any attempt feedback in the Attempt feedback textbox.
- Review the auto-graded questions, making any changes in the Score textbox that you deem necessary.

- Enter a score in the Score text box for the subjective questions. Note that it is always a good practice to review the auto-graded question types of
Short Answer, Multi-Short Answer, and Fill In The Blank to check for small spelling
and spacing errors.
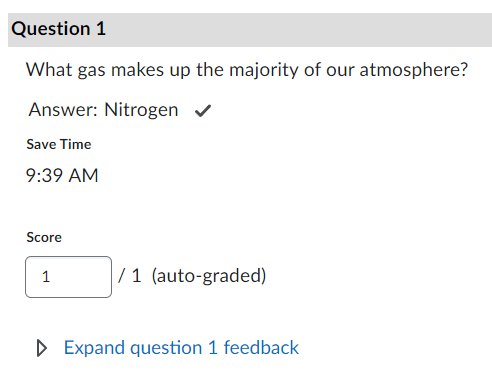
- Optional: Click the Expand question feedback hyperlink to open the question feedback textbox. Enter any additional feedback relevant to the particular question in this box. Note, submission views will need to be set up in order for students to view this feedback.
- Select a saving option:
- Update - Saves all changes made, updates the final grade score.
- Retract - Allows you to hide the score and feedback from students.
From the Attempts Tab
- From the Attempts tab of the Grade Quiz page, scroll to find an attempt within the attempts table.
- Note: You may want to use the Attempt filtering options to display only attempts meeting specific criteria.
- Note: You may want to use the Attempt filtering options to display only attempts meeting specific criteria.
- Click the Attempt hyperlink.

- If applicable, select the appropriate attempt for the selected student in the Attempt list.
- Optional: Click the Event Log hyperlink to display a pop-up window containing timestamped information for a student's quiz progression.
- Optional: The Attempt Grade textbox is auto-calculated by D2L, but you may override this score, if necessary.
- Optional: Enter any attempt feedback in the Attempt feedback textbox.
- Review the auto-graded questions, making any changes in the Score textbox that you deem necessary.
- Enter a score in the Score text box for the subjective questions.
- Optional: Click the Expand question feedback hyperlink to open the question feedback textbox.
- Select a saving option:
- Update - Saves all changes made, updates the final grade score.
- Retract - Allows you to hide the score and feedback from students.
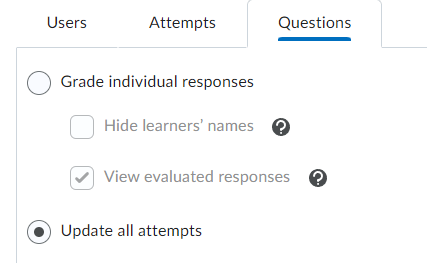
From the Questions Tab
- From the Questions tab of the Grade Quiz page, first determine if you want to Hide learners' names. Enabling this will display a student's answer, but not the student's name.
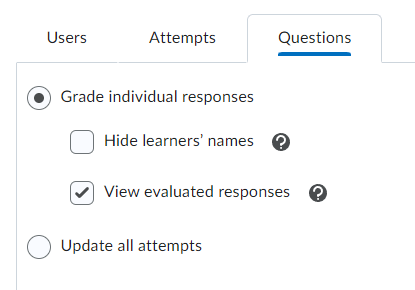
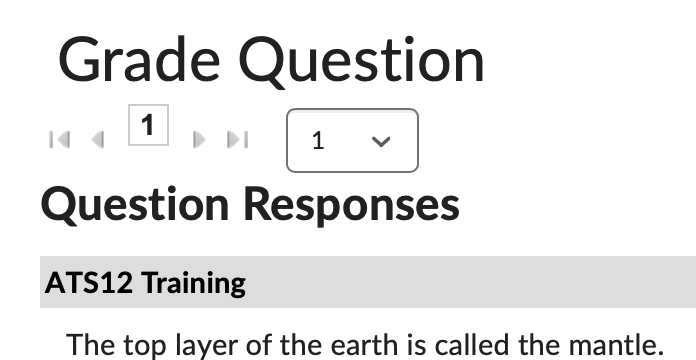
- Click the Question Title of the question you would like to grade.
- Optional: By default, only one student's answer displays. Use the << arrows >> to navigate to the next student's answer. Optionally, you can use the dropdown menu
to select the number of student answers to display per page.
- Enter a score in the Score text box for the subjective questions.
- Optional: Click the Expand question feedback hyperlink to open the question feedback textbox.
- Select a saving option:
- Save - Saves all changes, updates the final grade score, but remains on the attempt page.
- Save and Continue - Saves all changes, updates the final grade score and moves to the next question in the list.
- Go Back to Questions- Discards any unsaved changes and returns to the questions tab of the Grade Quiz page.
-
Students with an Attempt in Progress
You have three options when dealing with a student's attempt in progress:
- You can reset a student's attempt. Resetting a student's attempt will completely discard any answers the student saved, presenting the student with a new, blank quiz. Instructions for resetting a student's attempt is included in the next section.
- You can submit an attempt on the student's behalf. This option is available for students who may have experienced some technical difficulties when attempting to submit a quiz attempt.
- You can reopen a student's attempt. This option is available for students who may have experienced technical difficulties when attempting the quiz and you would like to grant them extra time. Directions are included in a separate section below.
Submitting on a Student's Behalf
These instructions will guide you through the second option, submitting a student's attempt on their behalf. This option will move the student's attempt from "in progress" to completed. Once the student's quiz has been completed, see the Grading - Students who have completed an attempt section to learn more about completely the manual grading workflow, if necessary.
- From the Users tab of the Grade Quiz page, select Users with an attempt progress from the Restrict to dropdown menu.
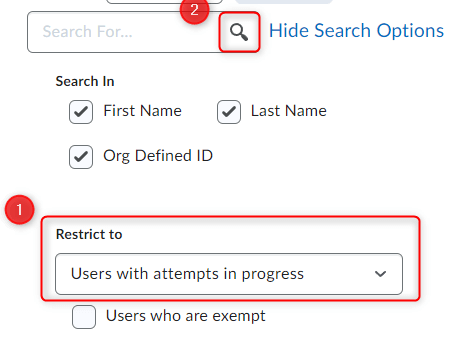
- Click the magnifying glass icon, located within the Search for textbox.
- If there are any students who were unable to submit the exam, or, if there are students
actively taking the exam, both will display in the attempts table.

- Click the Attempt hyperlink to review the Quizzes Event Log and to review the student's performance on the quiz. By reviewing the event log,
you can gather information to help you determine which avenue to explore: submit the
attempt or reset the attempt. Note that the Quizzes Event Log shows the timestamp and IP address information for student quiz progression. This
progression includes answers saved and paging changes. The event log does not capture
technical issues.
- If you have decided to submit the attempt on the student's behalf, click Cancel to return to the previous page.
- Click the person icon located to the right of the attempt hyperlink.
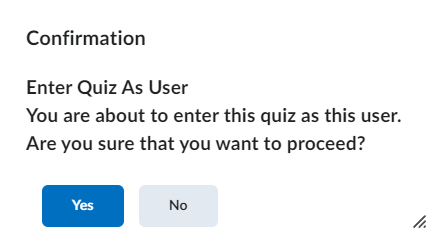
- Click Yes in the popup window alerting you that you are about to enter the quiz as the user
(student).
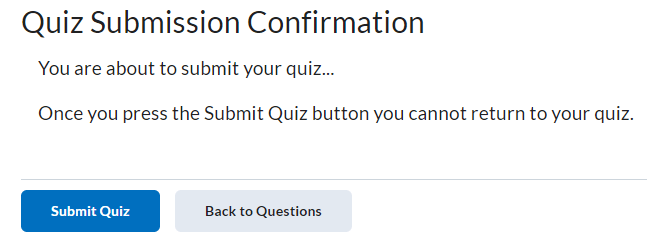
- Scroll to the bottom of the quiz page and click the Submit Quiz button.

- Click the Submit Quiz button on the Quiz Submission Confirmation screen.
- Click the Attempt hyperlink to review the Quizzes Event Log and to review the student's performance on the quiz. By reviewing the event log,
you can gather information to help you determine which avenue to explore: submit the
attempt or reset the attempt. Note that the Quizzes Event Log shows the timestamp and IP address information for student quiz progression. This
progression includes answers saved and paging changes. The event log does not capture
technical issues.
- This student's attempt will now be included in the Users who have Completed an Attempt section.
-
Resetting a Student's Quiz Attempt
You have two options when dealing with a student's attempt in progress:
- You can reset a student's attempt. Resetting a student's attempt will completely discard any answers the student saved, presenting the student with a new, blank quiz.
- You can submit an attempt on the student's behalf. This option is available for students who may have experienced some technical difficulties when attempting to submit a quiz attempt. Instructions for submitting a student attempt can be found in the previous section.
These instructions will guide you through the first option, resetting a student's attempt. Note that any answers the student selected will be discarded and unrecoverable.
- From the Users tab of the Grade Quiz page, select Users with an attempt progress"from the Restrict to dropdown menu.
- Click the magnifying glass icon, located within the Search for textbox.
- If there are any students who were unable to submit the exam, or, if there are students
actively taking the exam, both will display in the attempts table.
- Click the Attempt hyperlink to review the Quizzes Event Log and to review the student's performance on the quiz. By reviewing the event log,
you can gather information to help you determine which avenue to explore: submit the
attempt or reset the attempt. Note that the Quizzes Event Log shows the timestamp and IP address information for student quiz progression. This
progression includes answers saved and paging changes. The event log does not capture
technical issues.
- If you have decided to reset the student's attempt, click Cancel to return to the previous page.
- Mark the checkbox located to the left of the attempt hyperlink.
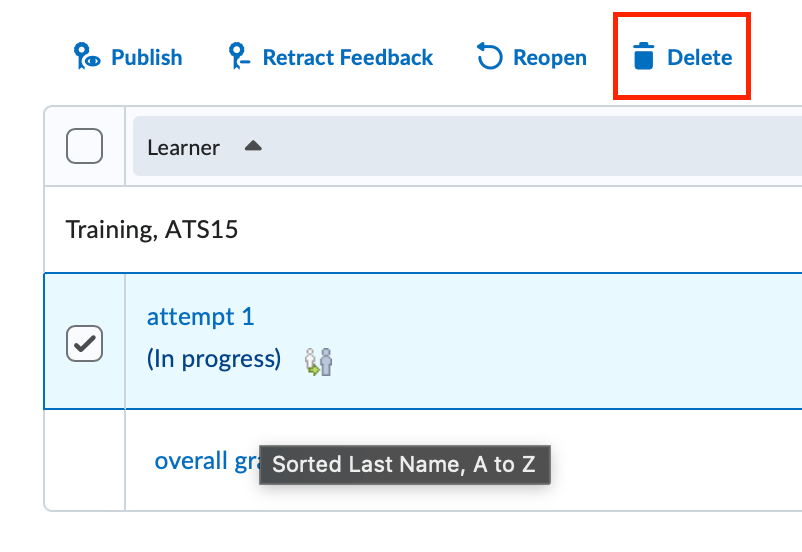
- Click the trashcan icon.
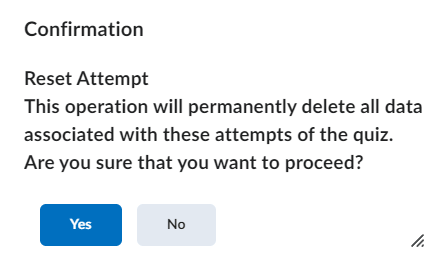
- Click Yes on the Confirmation screen.
- Click the Attempt hyperlink to review the Quizzes Event Log and to review the student's performance on the quiz. By reviewing the event log,
you can gather information to help you determine which avenue to explore: submit the
attempt or reset the attempt. Note that the Quizzes Event Log shows the timestamp and IP address information for student quiz progression. This
progression includes answers saved and paging changes. The event log does not capture
technical issues.
Note that the student will now be charged with retaking the exam or quiz.
-
Reopening a Quiz
These instructions will guide you through reopening a quiz for a student. This option will move the student's attempt from completed to "in progress" for the allotted amount of time in minutes granted. Once the student's quiz has been completed, see the Grading - Students who have completed an attempt section to learn more about completely the manual grading workflow, if necessary.
- From the Users tab of the Grade Quiz page, check the box next to the student's attempt and click
the reopen button.
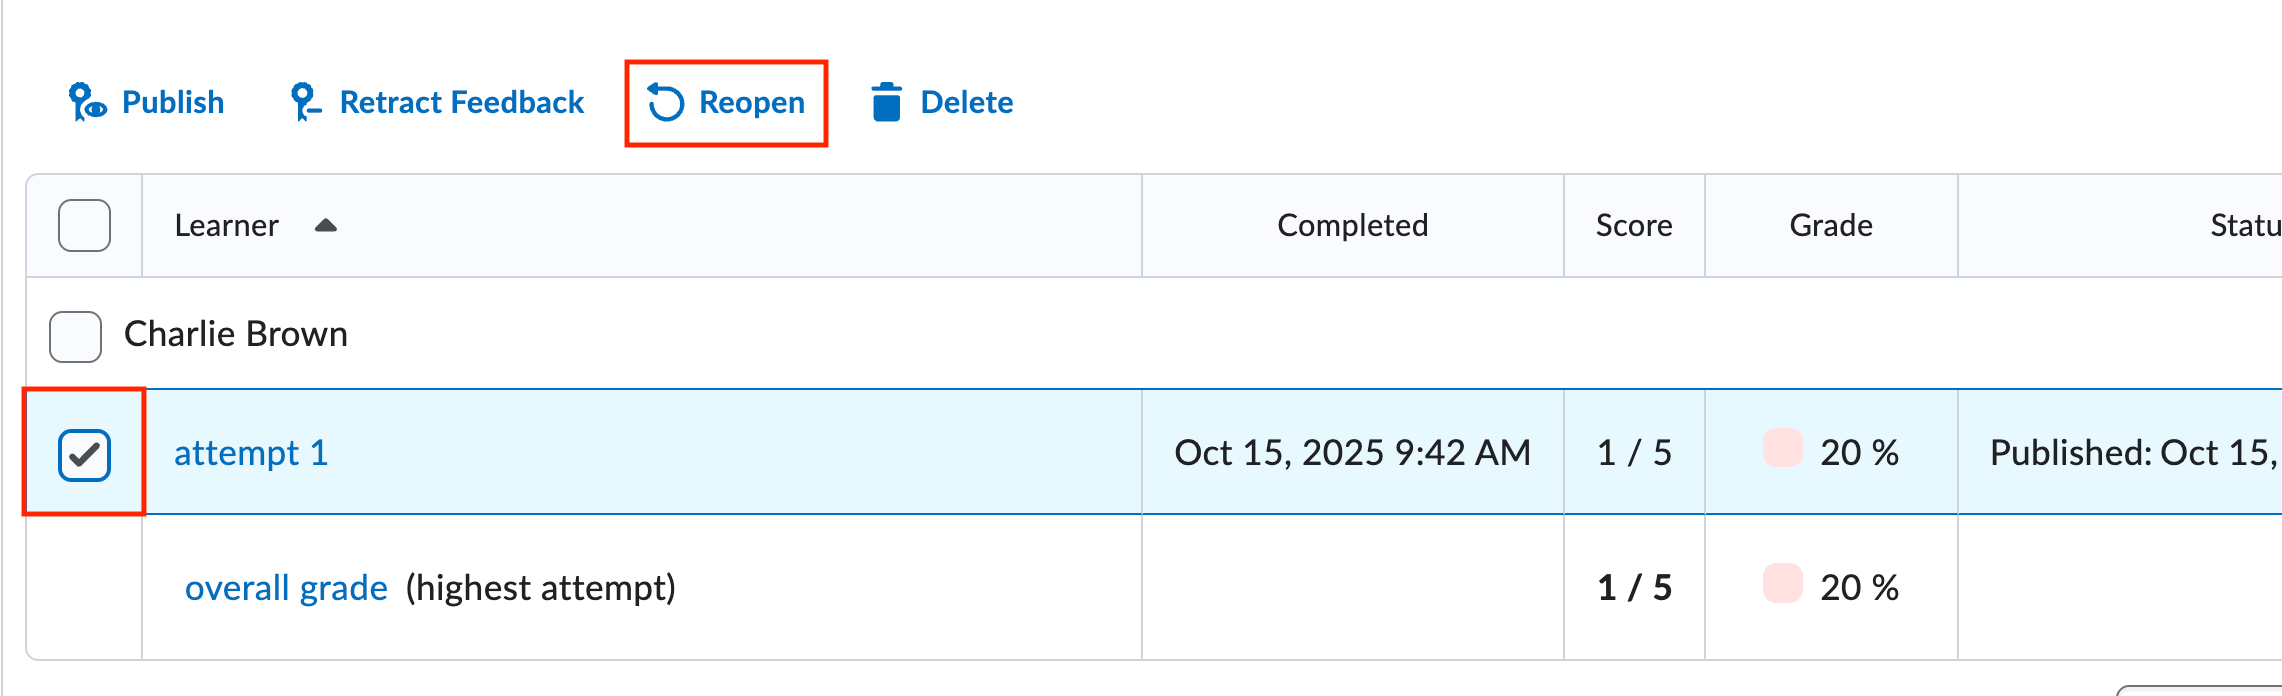
- Enter the amount of additional time you want to grant the student to complete the quiz.
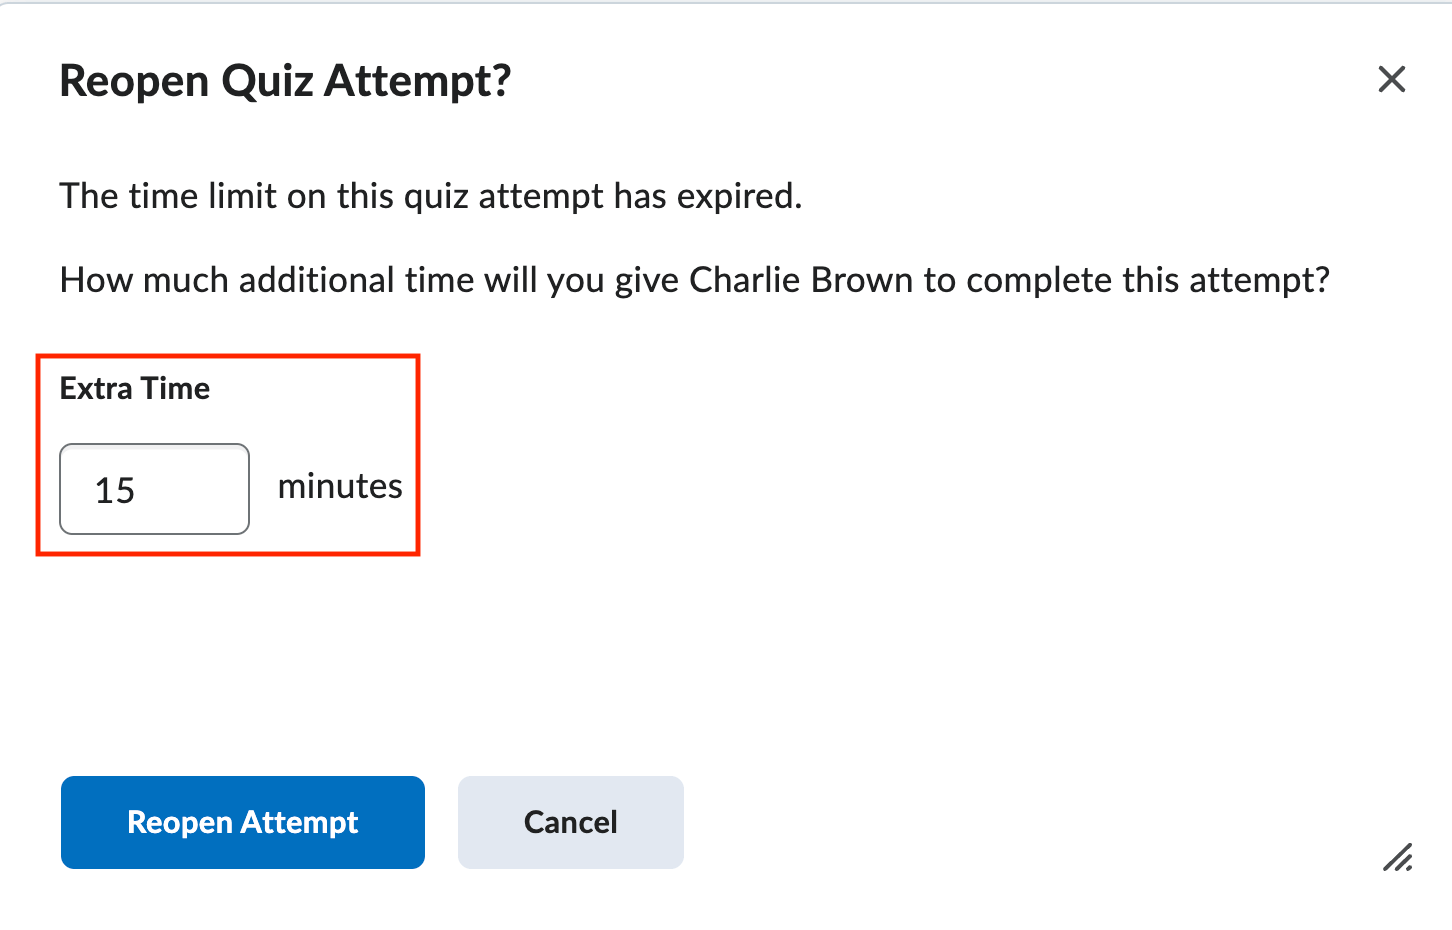
- Click the Reopen Attempt button to open the quiz back up for the student.
- From the Users tab of the Grade Quiz page, check the box next to the student's attempt and click
the reopen button.
-
Publishing Quiz Scores to the Gradebook
Quiz grades can be entered into the gradebook in three different ways:
- Quizzes contain all objective question types and, depending on your quiz settings, D2L automatically publishes and exports the grades to a grade item.
- Quizzes are manually graded and then, depending on your quiz settings, manually published to the gradebook by the instructor.
- Quiz grades are manually entered into the gradebook and are not associated with the D2L Quiz tool.
It is also important to note that students are unable to see any quiz grades that are not published.
To Publish Quiz Grades and Automatically Export Scores to the gradebook
- Determine how the quiz is configured by consulting the Edit Quiz page and Evaluation and Feedback section. Confirm that a grade item is linked to a grade item within the Grade Out Of area.
- Confirm that the Auto Publish option is selected and that Synchronize to grade book is also selected.
- Return to the Grade Quiz page.
- Check the box next to first name, last name to select all students in the list and
click the Publish icon.
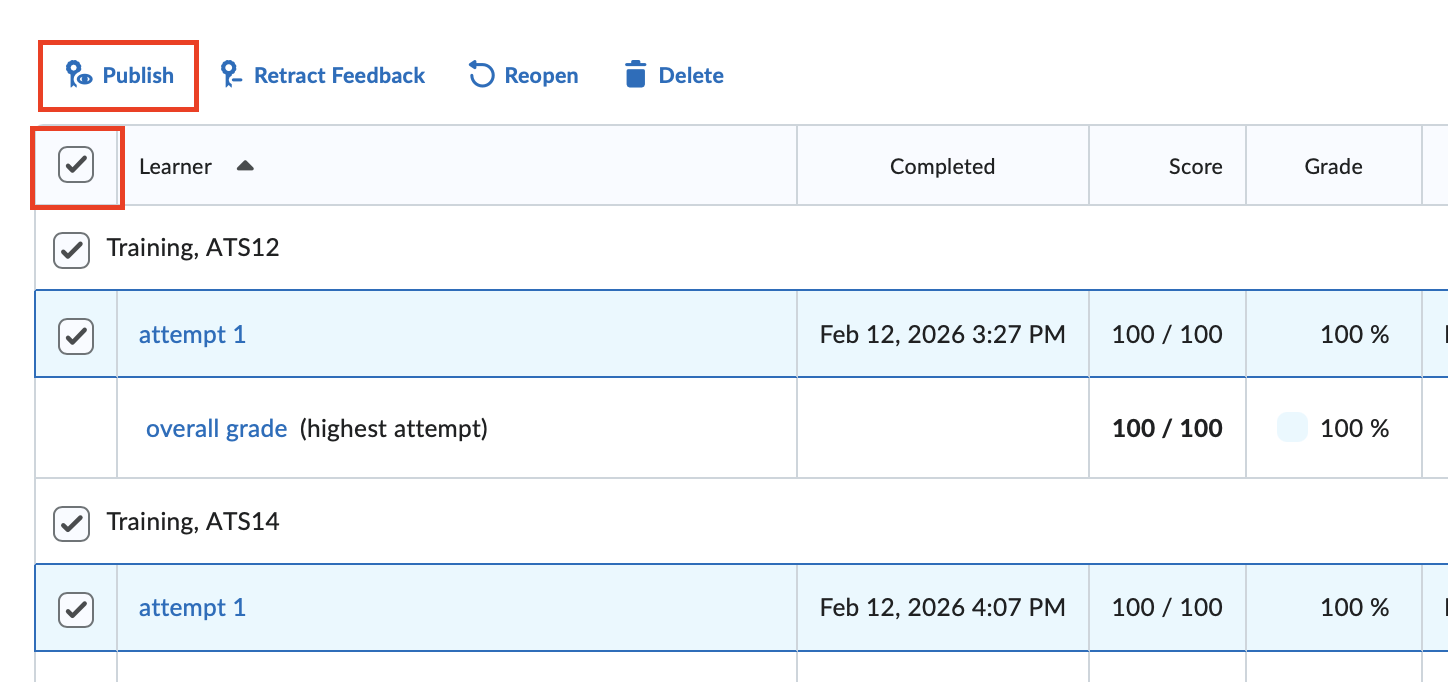
- Click the Yes button on the confirmation screen that pops up.
- If you have multiple pages of quiz attempts, repeat steps 3 and 4 for each page or change the number of attempts displayed per page.
- Once you have completed these actions, navigate to your grade book and confirm that all scores have been exported.
To Publish Quiz Grades and Manually Export Scores to the gradebook
- Determine how the quiz is configured by consulting the Edit Quiz page and Evaluation and Feedback section on the Edit Quiz page. Confirm that the Auto-publish option is not selected and that Synchronize to grade book is not selected.
- Return to the Grade Quiz page.
- Click the Published icon.
- If you have multiple pages of quiz attempts, repeat steps 3, 4, and 5 for each page.
- Once you have completed these actions, navigate to your grade book and confirm that all scores have been exported.
-
Throwing Out a Quiz Question
If you find an error in a quiz question setup or if you have reason to "throw out" a quiz question you may regrade the question and award points to all students or students who selected an answer option that differed from the option marked as correct. Follow these steps to regrade a question:
To Award Points Back to All Students
- From the Questions tab of the Grade Quiz page, select the Update All Attempts radio button.
- Click the Question Title of the question you would like to regrade.
- In the Grade section, click the Give to all attempts ___ points radio button. Enter the question point value in the points textbox. (Refer to the Question Worth section for the question point value.)
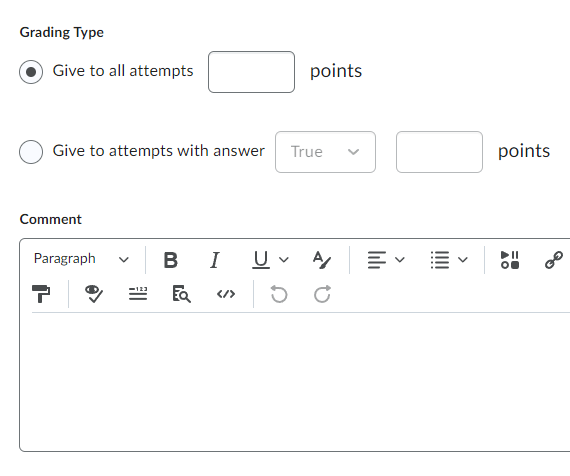
- Optional: Add any comments regarding the regrading of the questions.
- Select a saving option:
- Save - Saves all changes, updates the final grade score, but remains on the attempt page.
- Go Back to Questions- Discards any unsaved changes and returns to the questions tab of the Grade Quiz page.
To Award Points to Attempts that Selected an Alternate Answer
- From the Questions tab of the Grade Quiz page, select the Update All Attempts radio button.
- Click the Question Title of the question you would like to regrade.
- In the Grade section, click the Give to attempts with answer ___ ____ points radio button. Select an answer option from the dropdown menu that coordinates with
the answer option you want to award. Enter the question point value in the points textbox. (Refer to the Question Worth section for the question point value.)
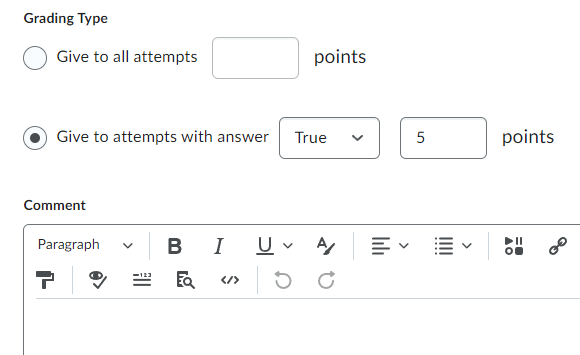
- Optional: Add any comments regarding the regrading of the questions.
- Select a saving option:
- Save - Saves all changes, updates the final grade score, but remains on the attempt page.
- Go Back to Questions- Discards any unsaved changes and returns to the questions tab of the Grade Quiz page.
- From the Questions tab of the Grade Quiz page, select the Update All Attempts radio button.
-
Troubleshooting Quiz Grades
A common problem reported to D2L help is an issue with quiz grades not exporting to the gradebook. There are two primary causes for this issue:
- Quiz grades will not export to the gradebook.
- Published Grades are not automatically exporting to the gradebook.
If your quiz grades are not exporting to the gradebook, it is typically because of one of two issues:
- There is not a grade item associated with the quiz/not set to auto export.
- Quiz scores are not published and/or set to automatically publish.
For the first reason, confirm the quiz's settings on the Edit Quiz - Grade out of area and in the Evaluation and Feedback section. If the quiz contains only objective questions, and those quiz grades should be automatically published and exported to the gradebook, confirm that there's:
- In Grade Book is showing in the Grade out of area on the Edit Quiz page.
- The Auto-publish attempt option is selected.
- The Synchronize to grade book option is selected.
For the second reason, confirm if the quiz contains objective and subjective (written response) questions, confirm that there's:
- In Grade Book is showing in the Grade out of area on the Edit Quiz page.
- The Auto-publish attempt option is NOT selected.
- The Synchronize to grade book option is selected.
Then, Navigate to the Grade Quiz screen and confirm that all attempts have been graded and that all attempts are published. There should be a published message in each attempt's Status column. If this message is missing, check the box next to first name, last name and click the Publish icon.
Sometimes published grades do not automatically export to the gradebook even if the Edit Quiz - Grade Out Of and Evaluation and Feedback settings are correct. If changes were made to the quiz's setup after students have attempted the quiz, the automatic exporting features may not function appropriately. Remember that is it always best practice to not make any changes to a quiz's setup after the quiz window has opened. But, if changes have been made and grades are not automatically exporting to the gradebook, try the following steps:
- Wait until the quiz window ends and all students have attempted the quiz.
- Navigate to the Edit Quiz - Grade out of and Evaluation and Feedback section and confirm the following settings:
- In Grade Book is showing in the Grade out of area on the Edit Quiz page.
- The Auto-publish attempt option is selected.
- The Synchronize to grade book option is selected.
- Return to the Grade Quiz page.
- Check the box next to first name, last name and click the Publish icon.
- If you have multiple pages of quiz attempts, repeat steps 3, 4, and 5 for each page.
- Once you have completed these actions, navigate to your grade book and confirm that all scores have been exported.
If you need further help, please contact d2lhelp@etsu.edu or call 423-439-8616.
Managing Quizzes
-
Print a Quiz
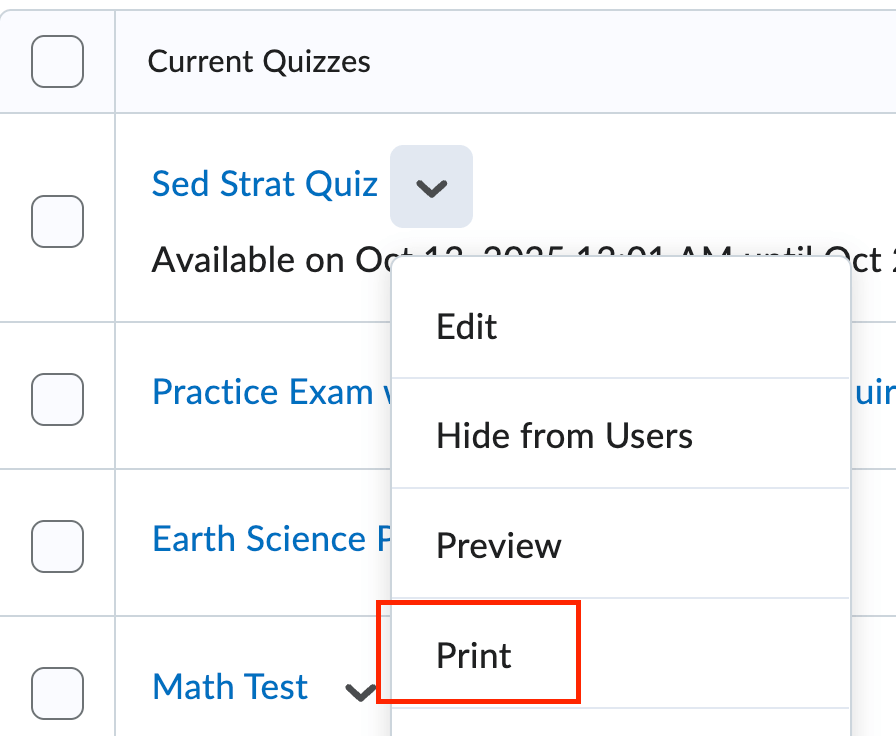
There is now an option to Print a copy of a quiz from the Assessments page.
- From the Manage Quizzes page, click the dropdown next to the quiz you want to print select Print from the dropdown menu.
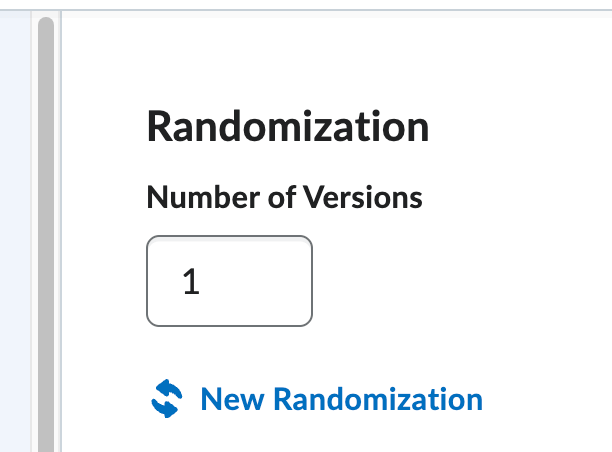
- Determine the options for the printed quiz.
- Randomization - allows you to create multiple versions of the quiz. Enter the number of versions you would like if applicable in the box.
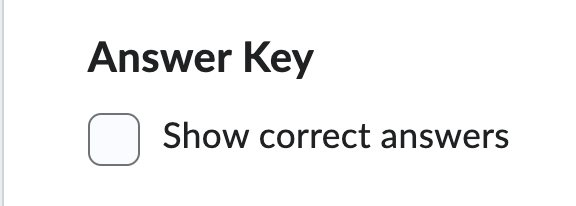
- Formatting - allows you to include a Name, Student ID, and Date Field on the printed copy.

- Answer Key - allows you to print out a copy of the quiz with the correct answers.
- Randomization - allows you to create multiple versions of the quiz. Enter the number of versions you would like if applicable in the box.
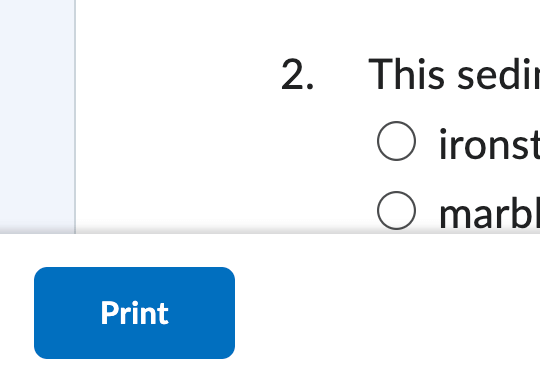
- Click the Print button to print a copy from your local printer.
- From the Manage Quizzes page, click the dropdown next to the quiz you want to print select Print from the dropdown menu.
-
Create a Quiz Category
Use categories to better organize the different types of assessments available to your students.
To Add a Quiz Category:
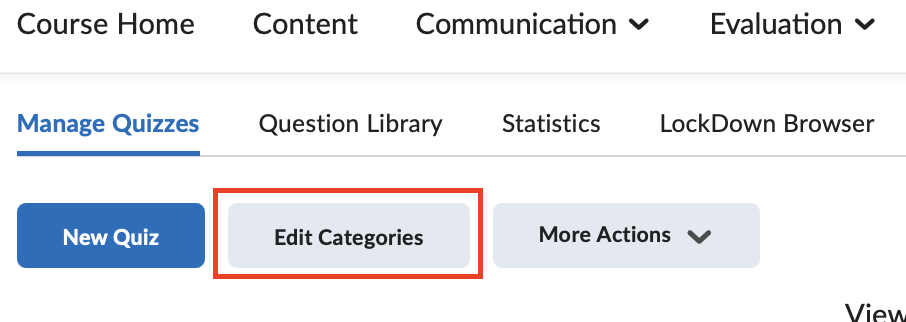
- From the Manage Quizzes page, click the Edit Categories button.
- Click the Add Category button.
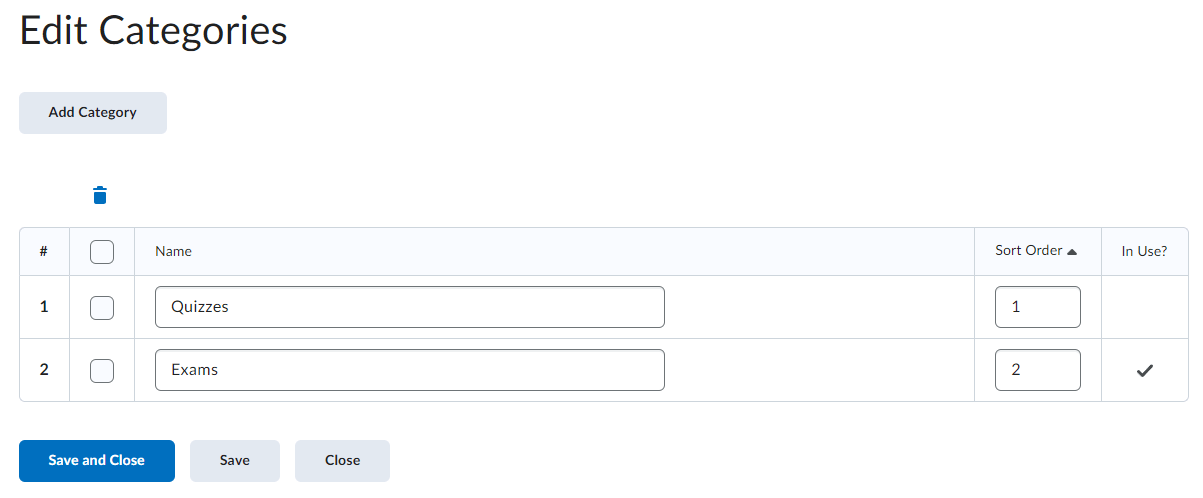
- Enter a Category Name in the Name column.
- Optional: Enter a Sort Order. Sort order will control the order of the categories on the Manage Quizzes page.
- Click Save and Close.
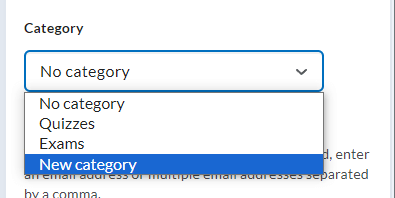
You can also create a category from within the Edit Quiz Page.
- From the Manage Quizzes page, click either New Quiz or select Edit Quiz from a preexisting quiz's context menu.
- Click on Attempts and Completion. For the Category option, select a preexisting category or click New category to create a new category.
To Delete a Quiz Category
- From the Manage Quizzes page, click the Edit Categories button.
- Mark the checkbox to the left of the category or categories you would like to delete.
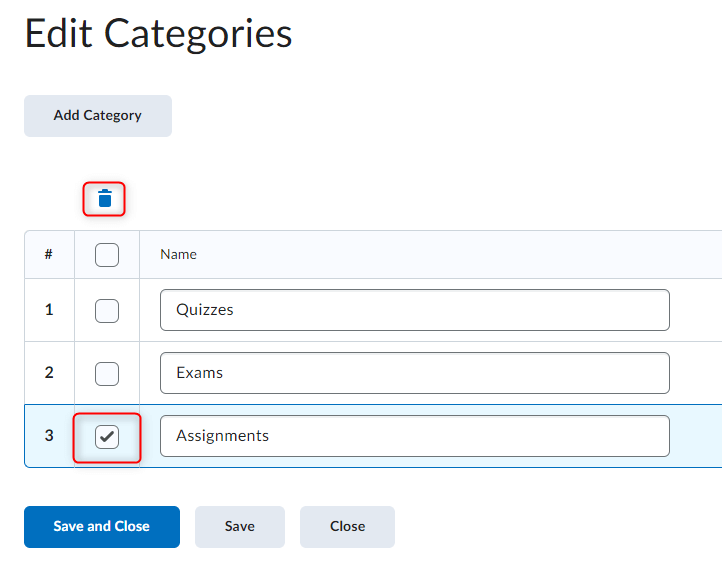
- Click the Trashcan Icon.
- Click Save and Close
- From the Manage Quizzes page, click the Edit Categories button.
-
Reorder Quizzes
Control the order your quizzes appear with the Reorder option.
- From the Manage Quizzes page, click the More Actions button and select Reorder from the dropdown menu.

- Select a number in the in the Sort Order dropdown. Note that the sort order will dynamically update with each sort order number
you select or change.

- Click Save to return to the Manage Quizzes page.
- From the Manage Quizzes page, click the More Actions button and select Reorder from the dropdown menu.
-
Copy a Quiz (Create a Duplicate Quiz)
Create a duplicate quiz by using the Copy feature
- From the Manage Quizzes page, click the dropdown next to the quiz you want to duplicate select Copy from the dropdown menu.

- This will create a duplicate of the quiz copied.
- Change the new Quiz Title. Note that the default name will be Copy of ____.
- Make any needed changes to the duplicated quiz.
- Click Save and Close.
- From the Manage Quizzes page, click the dropdown next to the quiz you want to duplicate select Copy from the dropdown menu.
-
Delete a Quiz
Delete a quiz by using the Delete feature
- From the Manage Quizzes page, check the box of the quiz or quizzes you would like to delete and click the
More Actions button and select Delete from the dropdown menu.
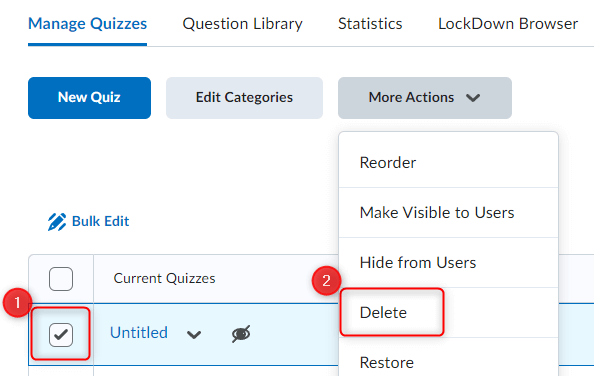
- Click the Delete button or Click Cancel on the Confirmation popup to return to the Manage Quizzes page.
- From the Manage Quizzes page, check the box of the quiz or quizzes you would like to delete and click the
More Actions button and select Delete from the dropdown menu.